
Find your way with clear instructions.
Find answers to your question about hosting, email, domain names and your website.
All guides
61 handleidingen
Backups and securityBackuply: cPanel hosting backups and requesting a restoreDrechthosting uses Backuply for backups in its cPanel environment. A backup is a copy that can help recover data after a failed update, for…Read the manual
Backuply: cPanel hosting backups and requesting a restore
Drechthosting uses Backuply for backups in its cPanel environment. A backup is a copy that can help recover data after a failed update, for example. Backuply for hosting servers is separate from its WordPress plugin: you do not need that plugin for our server backups.
Need to restore something?
- Note your domain, the problem and when the website last worked correctly.
- Check whether Backuply and restore points are available for your account in cPanel. If the option is missing, ask us for help.
- Discuss which files, database or other data need restoring. Available points and options may vary.
- Check which recent changes could be lost during a restore. If possible, save another copy of the current data.
- Afterwards, check your website, forms and relevant data.
A backup does not prevent infection. Ask us which restore points are available and which data you can recover from them.
Discuss a restore request with Drechthosting · Official Backuply for cPanel information
Backups and securityMonarx Security and Imunify: malware monitoring on cPanelAlongside Imunify, Monarx Security is present in Drechthosting’s cPanel environment. This software helps identify malicious website code. Monarx considers how code behaves. Available features…Read the manual
Monarx Security and Imunify: malware monitoring on cPanel
Alongside Imunify, Monarx Security is present in Drechthosting’s cPanel environment. This software helps identify malicious website code. Monarx considers how code behaves. Available features depend on the hosting environment’s configuration.
Why does security matter?
Malware can misuse your website, harm visitors or send unwanted email. Several security layers help reduce risks. Malware monitoring does not guarantee that every threat is prevented and does not replace updates or strong passwords.
What should you do about an alert?
- Note the alert, time and affected website or file.
- Contact Drechthosting without sending passwords or other login details.
- Do not simply delete or restore files: consult us first so useful website files can be preserved.
- After discussing the issue, address its cause, such as outdated software or insecure access.
Available security features depend on the configuration of your hosting environment. We help you understand the alert and discuss the next steps.
Backups and securityManage your website safely: backups, updates and accessWebsite security has several parts. Backuply, Imunify and Monarx Security are present in our cPanel environment. The way you manage your website and access…Read the manual
Manage your website safely: backups, updates and access
Website security has several parts. Backuply, Imunify and Monarx Security are present in our cPanel environment. The way you manage your website and access also matters.
- Update your website system and extensions. Save a recoverable copy before major changes.
- Use strong, unique passwords and two-factor authentication where available.
- Remove unused accounts and extensions, and give staff only the access they need.
- Install software from trusted sources.
- Check your website after updates and report unexpected changes.
- Discuss restoring a backup first: an old copy may also restore an old vulnerability.
SSL encrypts visitors’ connections. A backup helps recovery. Malware monitoring helps identify suspicious code. These measures complement one another.
DomainsHow do I add a domain name?Depending on your hosting package, you can add multiple domain names in cPanel. You don't have to take a separate hosting package per website. Important...Read the manual
How do I add a domain name?
Depending on your hosting package, you can add multiple domain names in cPanel. This way you do not have to take a separate hosting package per website.
Important
- For normal hosting packages you can use 1GB of working memory for PHP. For premium hosting packages this is from 2GB. If you have multiple websites on your hosting package, there is a chance that you will run against this limit faster.
- It is important that the domain name you add is actually registered and refers to the server that contains your hosting package.
Step-by-step guide
Step 1. Log in to cPanel.
Step 2. Under the category 'Domains', click 'Extra domains'.
Step 3. Under the text 'Create an extra domain' enter the desired domain name. The fields for the subdomain and the base directory are automatically completed. You don't need to change that.
Step 4. If you want the new domain name to have a separate FTP account, you can check 'Create an FTP account linked to this extra domain'. This is not necessary, as you can simply log on to your cPanel login data via FTP.
Step 5. Click 'Add Domain'. The additional domain name has now been created.
EmailHow do I use the webmail?You use our webmail if you want to view your email online. By using our webmail, you can do it anywhere you have an internet connection...Read the manual
How do I use the webmail?
You use our webmail if you want to view your email online. By using our webmail, you can do so anywhere you have an Internet connection.
Secure connection
We strongly recommend using a secure connection when using our webmail. This way, you will avoid your email being intercepted by a malicious user. You will use the following URL for a secure connection:
Login details
You use the email address you created as a username. As a password, you use the password you set for the email address.
EmailHow do I forward my email?If you do want to be able to receive e-mail on your domain name, but prefer to continue using Gmail or Outlook, you can forward the email received....Read the manual
How do I forward my email?
If you do want to be able to receive email on your domain name, but prefer to continue using Gmail or Outlook, you can forward the email received.
Step-by-step guide
Step 1. Log in to cPanel.
Step 2. Under the category 'E-mail', click on 'E-mail'.
Step 3. Click on 'Add Doorbender' to send a single e-mail address. If you want to forward all the e-mails sent to a domain name, click on 'Add Domain Bender'.
Step 4. Under 'Address', enter the e-mail address from which you want to forward the e-mail. Under 'Destination', enter the e-mail address to which the e-mail must be forwarded.
Step 5. Click on 'Add forwarder' to add the forwarder.
Remove an email forwarder
To remove a forwarder, click on 'Remove' on the respective forwarder. Then click on 'Remove the forwarder' to confirm the removal.
cPanelHow do I change my PHP version?How do I change my PHP version? You may want to use a different PHP version than the one that is enabled by default. Via cPanel...Read the manual
How do I change my PHP version?
How do I change my PHP version?
You may want to use a different PHP version than the one that is enabled by default. You can easily change the PHP version via cPanel.
Step-by-step guide
Step 1. Log in on cPanel.
Step 2. Click under the category Software on Select PHP Version.
Step 3. Click on the dropdown menu, select the desired PHP version and click Set as current to save the selection. The default PHP version is as native is indicated.
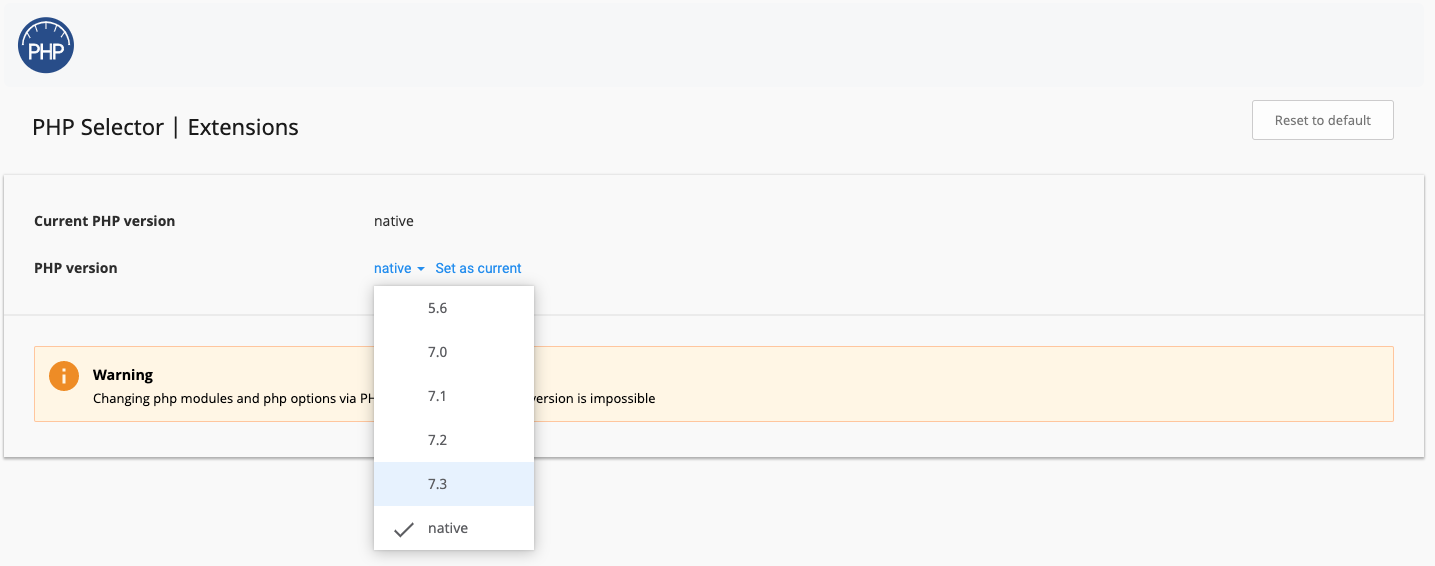
Enabling and disabling PHP modules
If you no longer use the default (native) PHP version, you can turn on and off the different PHP modules. You can do this by placing or removing a check mark for the name of the module. When you place or remove a check mark, it will be automatically saved and the module will be activated. If you want to restore the modules to the default settings, click on the top right Reset to default.
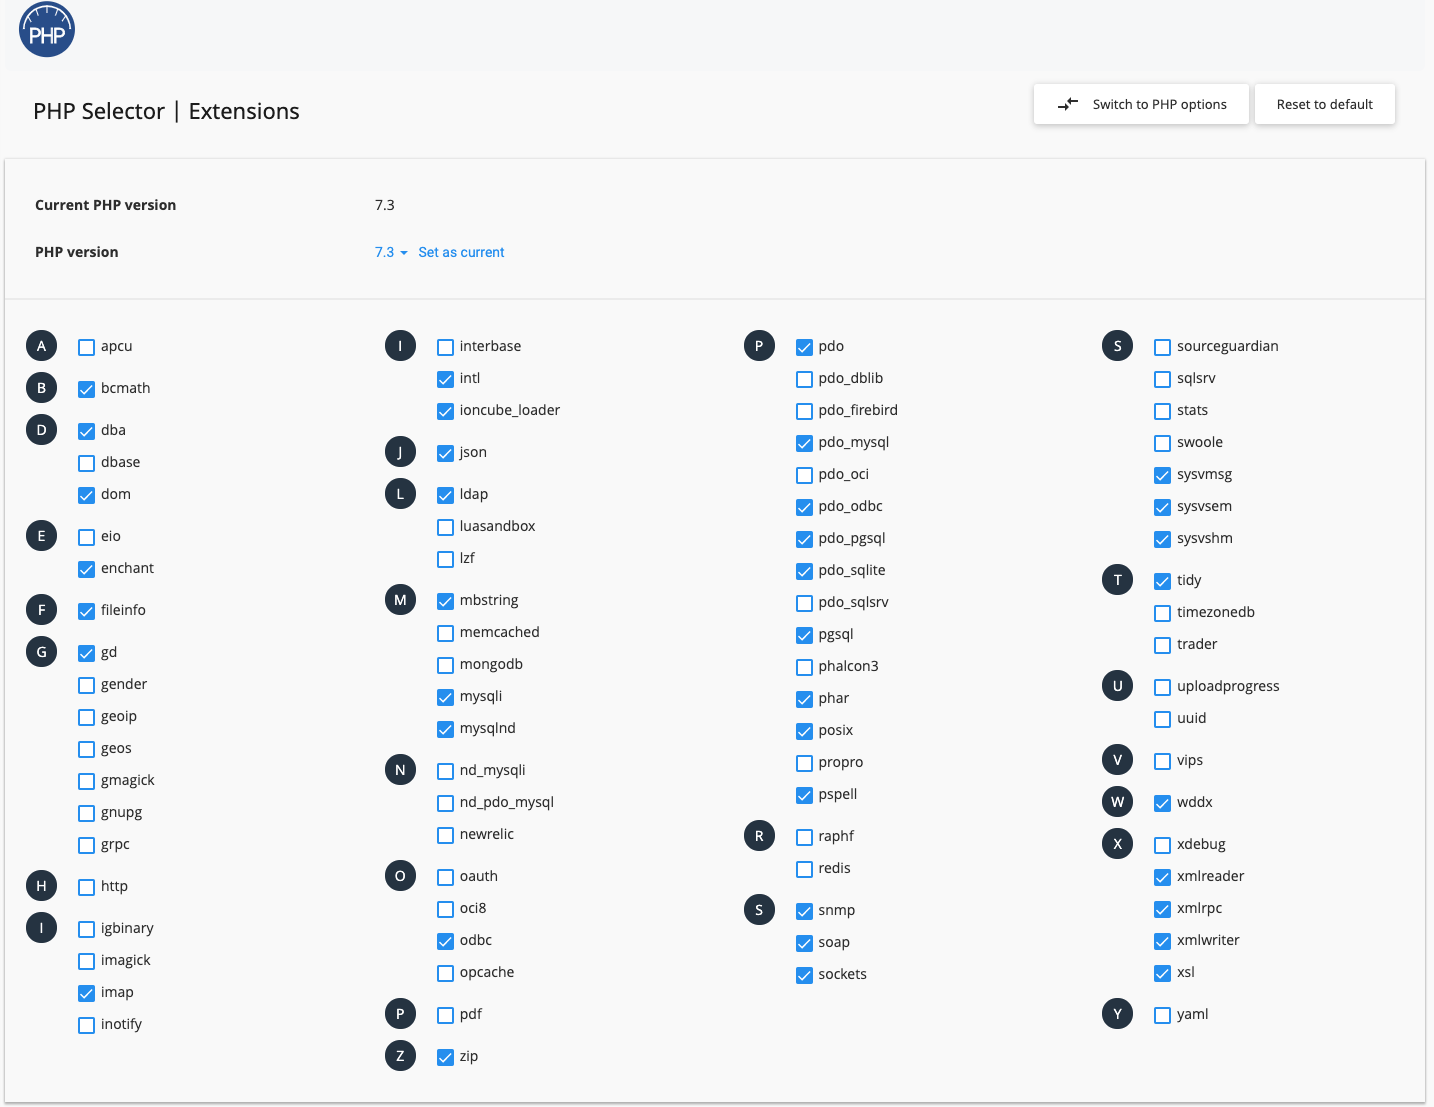
Changing PHP settings
You can also change the PHP settings when you are not using the default PHP version. You do that by clicking on Switch to PHP options. Then click on the text or the check mark next to an setting and make the desired change. If you make a change, it will be saved immediately.
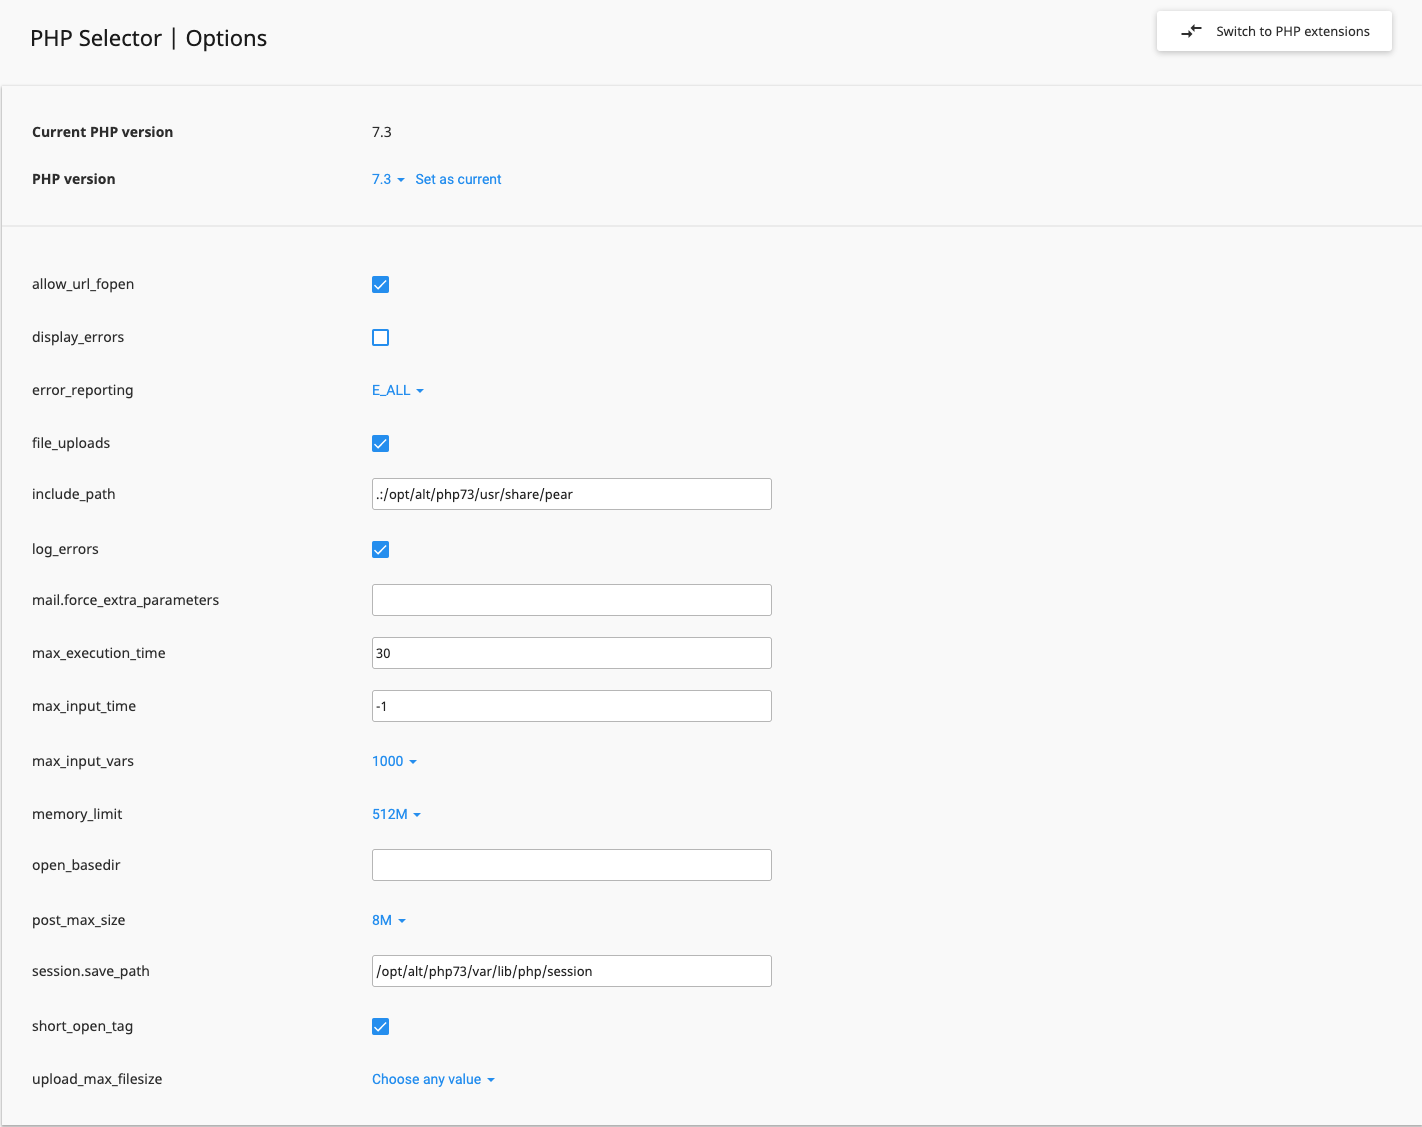
EmailHow do I create an email address?To be accessible via your domain name, you can easily create an email address via cPanel. With each hosting package, you can create an unlimited number of e-mail addresses...Read the manual
How do I create an email address?
To be accessible via your domain name, you can easily create an email address via cPanel. With each hosting package you can create an unlimited number of email addresses.
Step-by-step guide
Step 1. Log in to cPanel.
Step 2. Under the category 'E-mail', click 'E-mail accounts'.
Step 3. Enter the desired e-mail address and password under the text 'Add e-mail account'. When you have added multiple domain names to cPanel, choose from the dropdown menu under 'Domain' for which domain name you want to create the e-mail address.
Step 4. In 'Postbox quota', indicate how much storage space the email account gets. Your email account cannot use more storage space than your hosting package has.
Step 5. Click on 'Create account'. Your email account has been created.
GeneralHow do I install a WordPress plugin?There are thousands of free plugins available for WordPress. With a plugin you can easily expand the functionality of WordPress. StepsStep 1. Log in...Read the manual
How do I install a WordPress plugin?
There are thousands of free plugins available for WordPress. With a plugin you can easily expand the functionality of WordPress.
Step-by-step guide
Step 1. Log on to WordPress.
Step 2. In the left menu click on 'Plugins' and then on 'New plugin' at the top of the page.
Step 3. You will see an overview of most popular plugins. You can also search for a plugin, for example a plugin for a contact form.

Step 4. In the plugin you want to install, click on 'More details' to find out more about the plugin. Click 'Install now' to install the plugin directly.
Step 5. Depending on the plugin, it may take some time to complete the installation. After installation, click 'Activate' to activate the plugin.

Step 6. You now have a plugin installed. Each plugin works differently. Therefore, it is good to look up information about the plugin in advance.
GeneralHow do I log in to WordPress?To manage your WordPress site you need to log on to the administration panel. We explain how to do it. StepsStep 1. Determine where WordPress is...Read the manual
How do I log in to WordPress?
To manage your WordPress site you need to log on to the administration panel. We explain how you do it.
Step-by-step guide
Step 1. Determine where WordPress is installed. If WordPress is accessible via http://www.jouwdomein.nl, then that's the location where WordPress is installed.
Step 2. Go to the login page by adding 'wp-login.php' to the location. In the case of the above example you will find the login page by going to http://www.jouwdomein.nl/wp-login.php.
Step 3. Enter your username and password and click 'Log in'.
Forgot password
You can easily create a new password by clicking on 'Forgot your password?' on the login page. Enter your username or email address and click on 'Create new password'. You will now receive a new password on the email address linked to your username.
GeneralHow do I sync my calendar on iOS?Unfortunately, no support is provided on the calendar function and this manual is only intended to set this. By...Read the manual
How do I sync my calendar on iOS?
Unfortunately, no support is provided on the calendar function and this manual is only intended to set it up.
By syncing your calendar you can view the same calendar on all devices. You never miss an appointment:)
Step 1. Open the Settings

Step 2. Go to Mail, Contacts, Calendar

Step 3. Click New Account

Step 4. Click Other

Step 5. Choose Add CalDAV Account

Step 6. Please fill in the following details:
Server: https://mail.domain.nl:2080 (replace domain.nl here by your own domain)
Username: The mail address
Password: The password of the mail address
Description: Enter a name of the calendar here
Click Here Store

Step 7. Click on this button again Store

Step 8. Open the calendar app and press the plus sign

Step 9. Click Calendar

Step 10. Select the right calendar to sync with

The calendar now sync to the server
GeneralHow do I test the speed of my website?The loading time of your website shows how fast your website is. At too high a loading time, there is a good chance that your visitors...Read the manual
How do I test the speed of my website?
The loading time of your website shows how fast your website is. At too high a loading time, your visitors are likely to leave your website. To find out what caused the high loading time, you will perform a speed test with the free tool of Pingdom.
Important
- The tool used in this article has not been developed by us. Therefore, we cannot provide support for this tool.
- The speed of your website depends on various factors. You measure the speed of your website at that time and may vary at any time. The tool only gives suggestions about what you can improve.
Step-by-step guide
Step 1. Navigate To https://tools.pingdom.com.
Step 2. Under 'URL' enter the website you want to test and under 'Test from' select the option 'Stockholm, Sweden'. It is important to choose this location, because it is closest to the Netherlands. The distance between the test server and our servers affects the speed measured.
Step 3. Click on 'Start test' to start the test. After the test is completed, you will see an overview with a summary of the test results.

Step 4. Under 'Performance insights' click on the tabs that indicate a problem. Each tab shows how to fix the problem.
Step 5. Scroll down until you see 'File requests'. The table shows all the files that are loaded when loading the website. You can see the size of each file and how long it took to load it. This helps you to determine which files provide a high load time.
Tips
If you have many images it is wise to compress them. You can do this yourself before you upload the images to your website. If you use a software package like WordPress, then there are several plugins available that can do compressing for you. Also read our article 'How do I install WP Super Cache?' to boost your WordPress site.
AzuraCastConnecting Cloudflare to AzuraCastCloudflare can help to secure and speed up your AzuraCast streams and dashboard. Below we explain step by step how to connect Cloudflare...Read the manual
Connecting Cloudflare to AzuraCast
Cloudflare can help with the Secure and accelerate from your AzuraCast streams and dashboard. Below we explain step by step how to connect Cloudflare to your AzuraCast installation.
Step 1: Add your domain to Cloudflare
- Go to Cloudflare and log in.
- Click "Add Website" and feed you domain name in (e.g.
yourradiostation.com). - Cloudflare automatically scans your DNS records. Click "Continue'.
- Pick a free or paid plan and click on "Continue'.
Step 2: Configure DNS settings
- Make sure that there is one A record is for your server, for example:
- Type: A
- Name:
radio(or@for root domain) - Contents: Your server IP address
- Proxy status: "DNS only' (Prunus Grey cloud, not proxied)
- Add one CNAME record if you use a subdomain, such as
stream.yourdomain.com:- Type: CNAME
- Name:
stream - Contents:
radio.yourdomain.com - Proxy status: "DNS only'
Important: For streaming, the proxy disabled (grey cloud), because Cloudflare does not support audio/radio streams over their proxy.
Step 3: Adjust SSL/TLS settings
- Go to SSL/TS > Overview in the Cloudflare dashboard.
- Set to SSL mode "Full (Strict)' if your AzuraCast already has a valid SSL certificate.
- Don't you have a SSL yet? "Full" to use Cloudflare SSL.
Step 4: Firewall and security settings
- Go to Firewall > Settings and set the security mode Medium or Low.
- Add one firewall rule not to block stream traffic:
- Go to Firewall > Firewall rules > Add New Line.
- Rule:
- (URI Path contains /radio)
- Action: "Allow"
- Save and activate.
Step 5: Test and verify
- Wait a few minutes until the DNS settings are updated.
- Open https://jouwdomein.com or https://stream.jouwdomein.com to make sure everything works.
- Test your stream URL, for example:
Make sure it loads correctly.
Additional tips
✅ Use Page Rules in Cloudflare to make your AzuraCast dashboard faster.
✅ Check your SSL certificate and force HTTPS via Cloudflare Plugins Settings.
✅ Disable Rocket Loader below Speed to prevent conflicts.
With these steps you are AzuraCast installation safely connected to Cloudflare, which makes you benefit from improving security and performance!
AzuraCastCreating a mount point in AzuraCastWith a mount point in AzuraCast you can offer various audio streams, such as a main stream, a low bitrate version or a special live broadcast. Below is a step-by-step...Read the manual
Creating a mount point in AzuraCast
With a mountpoint in AzuraCast you can offer different audio streams, such as a main stream, low bitrate version or special live broadcast. Below follows a step-by-step guide to a new mount point to be produced.
Step 1: Login to AzuraCast
- Go to the management page from your AzuraCast installation.
- Log in with your username and password.
- Select the radio station for which you want to create a mount point.
Step 2: Go to MountPoints Settings
- In the left menu click on "Mountpoints'.
- Click Add New Mountpoint.
Step 3: Configuring Mountpoint
- Mountpoint URL: Specify a name (for example
/stream.mp3or/live. ogg). - Format: Choose the desired audio format (MP3, AAC+, OGG, OPUS).
- Bitrate (kbps): Select the desired bitrate (e.g. 128 kbps for good quality or 64 kbps for mobile use).
- Publish in Directories: Choose whether this stream must be visible in Shoutcast/Icecast directories.
- Fallback mount (optional): Specify an alternative stream if not available.
- Automatically Restart: Leave this enabled to minimize interruptions.
Step 4: Save and Activate
- Click "Save" to apply the institutions.
- Restart the server via the dashboard to activate the changes.
Step 5: Test Mountpoint
- Open a media player (such as VLC or a browser).
- Enter the stream URL in, for example:
- Make sure the stream is played correctly.
Tip: Use multiple mount points for different qualities or formats, to give listeners the best experience on any device!
With these steps, your new mountpoint ready to use and listeners can easily tune to your radio station!
AzuraCastRequesting an SSL certificate in AzuraCastUsing an SSL certificate in AzuraCast ensures that your radio streams and management environment are securely accessible via HTTPS. This is important for reliability,...Read the manual
Requesting an SSL certificate in AzuraCast
The use of a SSL Certificate in AzuraCast ensures your radio streams and management environment safe via HTTPS This is important for reliability, security and compatibility with modern browsers and streaming services.
Step 1: Login to the server
To install an SSL certificate, you need access to the server which AzuraCast runs on. This can be done via SSH.
- Open a SSH terminal (e.g. via PuTTY or the terminal in Linux/macOS).
- Log on to the server with your admin data:
Step 2: Apply for Encrypt SSL certificate.
AzuraCast has a built-in Let's Encrypt Integration to easily obtain a free SSL certificate.
- Run the following command to start the SSL installation:
Replace
yourdomain.comby the real domain name of your AzuraCast installation. - The installation checks your domain and automatically generates an SSL certificate.
Step 3: Make sure SSL is switched on correctly
- Open AzuraCast in your browser via
https://jouwdomein.com. - Check that there is one security lock in the address bar.
- Test your radio stream whether it is HTTPS supports.
Step 4: Automatically renew SSL certificate
Please note that Encrypt certificates have expired every 90 days, but you can automate the renewal:
- Add one cronjob to renew the certificate periodically:
- Or use a scheduled task (
crontab -e):
(This task runs every Monday at 03:00.)
Solving problems
- Ports 80 and 443 must be open on your server/firewall.
- Your domain must refer correctly to the AzuraCast server.
- Check the log files if the SSL request fails:
With these steps you are AzuraCast installation protected with SSL and ready for secure streaming and management via HTTPS!
AzuraCastHow do I embed the stream on my own website?Do you want visitors to listen to your radio station directly via your website? With the Drecht Hosting Stream Player Generator player generator you can easily...Read the manual
How do I embed the stream on my own website?
Do you want visitors to listen directly to your radio station via your website? Drecht Hosting Stream Player Generator you can easily generate an HTML5 player that works on desktop, tablet and mobile devices. HTML5 audioplayers are used by default nowadays because modern browsers no longer support Flash.
What do you need?
Before you start, make sure you have the following data at hand:
- Stream URL or server address
- Gate number of the stream
- Possible mount point (at Icecast)
- SHOUTcast or Icecast stream server type
- HTTPS stream if available
Note: If your website is running via HTTPS, the stream should preferably also be available via HTTPS. Otherwise, browsers can block the stream due to security rules.
Back upHow do I use automatic backups with Softaculous?For any software package you install via Softaculous, you can set up automatic backups, ensuring you have a recent backup...Read the manual
How do I use automatic backups with Softaculous?
For any software package you install via Softaculous you can set up automatic backups, so you can always be sure that you can restore a recent backup if your website doesn't do it anymore.
New installation
Step 1. Log in to cPanel.
Step 2. Click under the category Software on Softaculous Apps Installer.
Step 3. Softaculous is now being opened. Select the software package you want to install. In this article we choose WordPress.
Step 4. Enter all required fields. Then click at the bottom of the page Additional Options.
Step 5. Select On Automatic backups the interval of the backups. We advise to have a backup made every day.
Step 6. Select On Backup Rotation how many backups you want available. If you choose 4, then after 4 days the oldest backup will be automatically deleted. If you choose 'No limit', no backup will be deleted, but your hosting package will be filled faster.
Please note: Because it is not allowed to use web space as backup and/or file storage, we automatically remove Softaculous backups from our Shared Hosting servers once every 1-2 weeks. You can download backups and save them locally so you can upload them whenever you need them.

Step 7. Click Install to start the installation. Automatic backups are activated immediately.
Existing installation
Step 1. Log in to cPanel.
Step 2. Click under the category Software on Softaculous Apps Installer.
Step 3. Softaculous will now be opened. Click on the fourth icon at the top left to see all existing installations.

Step 4. In the installation for which you want to activate automatic backups, click on the pencil.
Step 5. Select On Automatic backups the interval of the backups. We advise to have a backup made every day.
Step 6. Select On Backup Rotation how many backups you want available. If you choose 4, then after 4 days the oldest backup will be automatically deleted. If you choose 'No limit', no backup will be deleted, but your hosting package will be filled faster.

Step 7. Click at the bottom of the page Change installation data. Automatic backups are now activated.
Back upHow do I restore a backup with cPanel?This article assumes that you have made a backup with cPanel. Step plan Step 1. Log in to cPanel. Step 2. Click under the category...Read the manual
How do I restore a backup with cPanel?
This article assumes that you have made a backup with cPanel.
Step-by-step guide
Step 1. Log in to cPanel.
Step 2. Under the 'Files' category, click 'Backup Wizard'.
Step 3. Choose the type of backup you want to put back. You have the following choices:
- Base DirectoryThis is a file that contains all the data from your hosting package, including the folder that contains your website.
- MySQL DatabasesThis is a file with all databases and their contents.
- Mail forwarders/filters. This is a file containing all email forwarders and filters.
Step 4. Select the file and click 'Upload'. Depending on the size of the file it may take a while.
Step 5.. After uploading is finished, the backup is restored. You don't have to do anything yourself.
Back upHow do I restore a website backup with AutoBackup?Restore backup from website Before recovering the backup, it is advisable to decide if you want to lose the current data...Read the manual
How do I restore a website backup with AutoBackup?
Restoring a website backup
Before recovering the backup it is advisable to decide whether you want to lose the current data. Any changes in your website made after the backup date will be overwritten, think of comments, page and blog changes as well as orders in your webshop (this is often stored in the database). If you want to literally go back to the date of the chosen backup, it is advisable to use file management in cPanel first folder where your website is able to empty by moving or deleting those files. Autobackup will only overwrite files when you ask but will not delete files that do not appear in the backup.
Step-by-step guide
Step 1. Log in to cPanel.
Step 2. Under the category 'Files' click on AutoBackup.
Step 3. You get to a new screen. You now see the Dashboard from which you can go to Databases, Files and Email. You will find the backups of the databases below Databases and the files below Files.
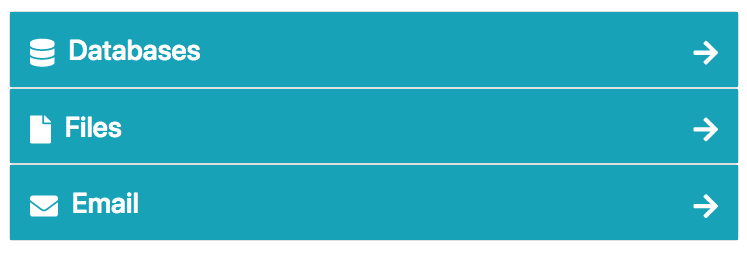
Step 4. Click Files.
Step 5. You can see here on the left an overview of the available backups of the files, sorted by date, from new to old. On the right you can see the history of previous backups that have been recovered.
Step 6. Click on the date from when you want to recover a file backup. You now see a new overview.
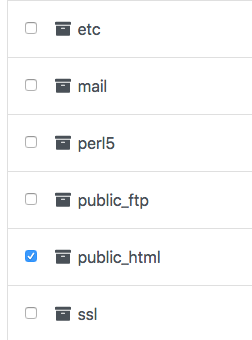
Step 7. You can navigate through the folders by click on the foldersWith the back button you can go back to the previous screen. Then select the folders and their contents you want to restore by placing checkmarks on the bridling folders and files and clicking on Restore selected filesFor the main domain is this always the folder public_html. If you all want to return your package (including emails) then click Full restore.
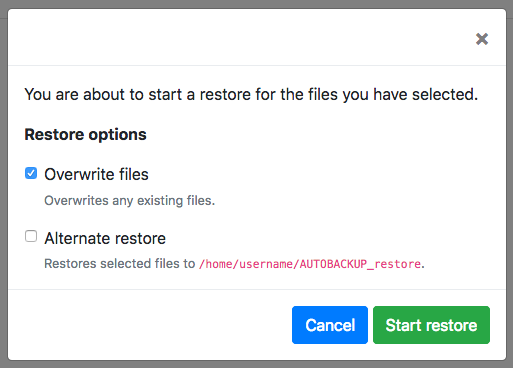
Step 8. You now get a popup with Restore options. Select Overwrite files so that files that were updated are replaced with the version from the backup (if you do not want to leave this option out) If you do want to recover the old version of files but do not want to overwrite the current files then choose the option Alternate restore.
Step 9. Depending on the amount of files you want to recover, the process may take a while. If anything goes wrong during recovery or download, please contact us. We will be happy to help you!
Step 10. When restoring the backup is complete click on Databases Top of the screen.

Step 11. You can see here on the left an overview of the available backups of the databases, sorted by date, from new to old. On the right you can see the history of previous backups that have been restored.
Step 12. Click on the date when you want to restore a database backup.
Step 13. Click on the right Start Restore.
Step 14. The selected databases are now being restored. Depending on the amount of databases and the size of each database, it may take a while. If anything goes wrong during recovery, please contact us. We will be happy to help you!
Step 15. After the database backup has been restored, there is no database user more connected to this database. It is important that you now the current database user rematches You can do this via Back to cPanel - > MySQL Databases - > Add User to Database.
Back upHow do I create a backup with cPanel?When you are working on your website and want to make sure that it can recover in its original state, or just to be sure: ...Read the manual
How do I create a backup with cPanel?
When you are working on your website and want to make sure that it can recover in its original state, or just to be safe: making a backup is always wise. You can easily back up via cPanel.
Step-by-step guide
Step 1. Log in to cPanel.
Step 2. Under the 'Files' category, click 'Backup Wizard'.
Step 3. Click 'Backup'. Then choose the kind of backup you want to make back. You have the following choices:
- Full Backup. This allows you to make a full backup of your cPanel account. You cannot use this backup to recover via cPanel, but to transfer your cPanel account to another server.
- Base Directory. This allows you to create a backup of the basic directory. Here are all the files from your hosting package, including the files from your website.
- MySQL Databases. This allows you to back up all databases and their contents.
- Forwarders for email & Filters. This allows you to back up all email forwarders and filters.
Step 4. After choosing an option, you can download the corresponding file to your computer. With this file, you can restore the backup made, so save it properly.
CMSHow do I secure my WordPress website?Securing your WordPress website is essential to protect your data and that of your visitors. With a few simple steps you can...Read the manual
How do I secure my WordPress website?
Securing your WordPress website is essential to protect your data and your visitors' data. With a few simple steps, you can better secure your website against hackers and other threats.
Step 1: Update WordPress, Theme & Plugins Regularly
- Make sure to always use the latest version of WordPress.
- Update your theme folders and plugins regularly as well. Deprecated versions often contain security holes.
- Go to Dashboard > Updates and make sure any updates are available.
Step 2: Use strong passwords
- Choose a password consisting of at least 12 characters, with a mix of capitals, small letters, numbers and special characters.
- Avoid simple passwords such as "123456" or "admin."
Step 3: Change the default username 'admin'
- Hackers often focus on username accounts admin.
- Create a new administrator with a unique username and remove it adminAccount.
Step 4: Install a security plugin
- Security plugins help to protect your website. Popular options are:
- Wordfence Security
- iThemes Security
- Sucuri Security
- Go to Plugins > New Plugin, find the desired plugin and click Install and then Activate.
Step 5: Use SSL certificates
- Activate an SSL certificate to ensure a secure connection (https://).
- Most hosting providers offer free SSL certificates via Let's Encrypt, for example.
- Check in your cPanel if SSL is already set, or ask your hosting provider for help.
Step 6: Limit login attempts
- Install a plugin like Limit Login Atempts Reloaded To prevent brute force attacks.
- This plugin reduces the number of failed login attempts and blocks suspicious IP addresses.
Step 7: Make your own backups regularly
- Use a plugin like UpdraftPlus to set up automatic backups yourself.
- Save backups to an external location, such as Google Drive or Dropbox.
Step 8: Enable two-factor authentication (2FA)
- With 2FA you add an extra layer of security to your login process.
- Plugins like Google Authenticator or WP 2FA help you with this.
Step 9: Limit access to the wp-admin folder
- Secure access to wp-admin by setting up an IP whitelist via your hosting or a security plugin.
Step 10: Regularly check for malware
- Use security plugins or tools like Sucuri to scan your website regularly for malware and suspicious activities.
By following these steps, you can significantly improve the security of your WordPress website.
Do you have questions or need help with the implementation of one of these steps? Please feel free to contact our support department.
CMSHow do I enable WordPress debug mode?Enabling WordPress Debug mode is essential to fix errors and issues on your website. Debugging helps you to resolve errors in...Read the manual
How do I enable WordPress debug mode?
Enabling the WordPress Debug Mode is essential to solve errors and problems on your website. Debugging helps you to detect and resolve errors in theme features, plug-ins and custom code. In this manual you will learn how to activate and optimally use WordPress debug mode.
What is the WordPress Debug mode?
The Debug Mode in WordPress is a built-in feature that makes error messages and warnings visible. This is useful during the development or troubleshooting of your website.
How do I enable debug mode in WordPress?
1. Login to your hosting environment
Use an FTP client (such as FileZilla) or the file manager in your hosting panel to access your WordPress files.
2. Open the wp-config.php file
- Find the file wp-config.php in the main folder of your WordPress installation.
- Open the file with a text editor such as Notepad++ or the built-in editor of your hosting.
3. Enable debug mode
Search the file for the line:
phpDefine('WP_DEBUG', false);
Change this to:
phpDefine('WP_DEBUG', true);
4. Log debug information (optional)
To save error messages to a log file, add the following lines under the WP_DEBUG-line:
phpDefine('WP_DEBUG_LOG', true); // Logs errors in wp-content/debug.log Define('WP_DEBUG_DISPLAY', false); // Prevents errors from appearing on the website @ini_set('display_errors', 0); // Suppresses errors on the screen
5. Save the changes
Save the changes and upload the file to the server again (if you use FTP).
Viewing the debug log
If you want to analyze error messages, you can debug.log file find in the folder /wp content/. Open this file with a text editor to view detailed error messages.
Disable debug mode
Once you have solved the problems, it is important to disable the debug mode. Set the value of WP_DEBUG again on false:
phpDefine('WP_DEBUG', false);
Common problems and solutions
- Error messages remain visible: Check that
WP_DEBUG_DISPLAYis set tofalse. - No debug log file: Make sure the folder /wp content/ has writing rights (usually 755 or 775).
- Access denied to wp-config.php: Contact your hosting provider if you cannot edit the file.
Conclusion
Enabling the WordPress Debug Mode is a powerful tool for developers and website owners to resolve problems. Follow these steps carefully and don't forget to disable debug mode when you're done.
Do you have questions about debugging in WordPress? Leave a comment, and we will help you further!
CMSHow to increase the WordPress memory limit?If you run into error messages such as "Allowed memory size exhausted", raising the WordPress memory limit is an essential step to smooth your website...Read the manual
How to increase the WordPress memory limit?
If you are against error messages like "Allowed memory size exhausted" is increasing the WordPress Memory Limit an essential step to make your website run smoothly. In this guide we will show you step by step how to easily adjust the memory limit of WordPress.
What is the WordPress memory limit?
The WordPress Memory Limit determines how much memory your website can use to perform scripts and functions. If this limit is set too low, it can lead to error messages or slowness, especially when using heavy plug-ins or theme templates.
Why increase the memory limit?
Raising the WordPress memory limit is often required at:
- Running complex plugins like WooCommerce or page builders.
- Websites with lots of traffic or advanced features.
- Preventing error messages such as "Fatal error: Allowed memory size exhausted".
How to increase the WordPress memory limit?
1. Check the current memory limit
Go to Tools > Site Health > Info > Server in your WordPress dashboard. Here you will find the current PHP memory limit.
2. Customize memory limit via wp-config.php
- Log on to your server via an FTP client or your hosting environment.
- Open the file wp-config.php in the main folder of your WordPress installation.
- Add the following code before the line
/* That's all, stop editing! Happy blogging. */:phpDefine('WP_MEMORY_LIMIT', '256M'); - Save the changes and upload the file back.
3. Use php.ini for more control
- Find the file php.ini in your hosting environment.
- Add or modify the following line:makefile
memory_limit = 256M - Save the file and restart the server if necessary.
4. Alternative: Adjust via .htaccess
If you don't have access to php.ini, you can create the file .htaccess edit:
- Open the file in the root folder of your WordPress installation.
- Add the following line:
php_value memory_limit 256M - Save the changes and upload the file back.
Common problems when increasing the memory limit
- No effect after changes: Some hosting providers limit the memory limit at server level. In that case, contact your hosting provider.
- Error in .htaccess: Check if you have used the right syntax. Incorrect rules can make your website unreachable.
Conclusion
Raising the WordPress Memory Limit is a simple way to improve the performance of your website and to prevent error messages. Whether you use wp-config.php, php.ini or .htaccess, the process is accessible to both beginners and advanced.
Do you have any questions or fail? Let us know, and we will be happy to help you to optimize your WordPress website!
Modify Memory Limit in WordPress is one of the best ways to make your website more efficient. Make sure you check regularly if the limit is sufficient for your current
CMSHow do I import my current installation in Softaculous?For example, when you have installed your CMS like WordPress manually, or you have moved your website from another hosting party, it is not always included in Softaculous. In this article we...Read the manual
How do I import my current installation in Softaculous?
If, for example, you CMS like WordPress manual installed, or you have website moved from another hosting party, it is not always included in SoftaculousIn this article we show you how to install this installation import, so you can also install in Softaculous manage.
What is Softaculous?
Softaculous is an installation plugin in cPanel, which can install popular scripts such as WordPress, Joomla, Magento and many more scripts. For more information about for example installing WordPress with Softaculous we refer to the WorPress installation article.
Step-by-step: importing an existing installation into Softaculous
Step 1: Log in to cPanel.
Step 2: Go under the heading Software to Softaculous Apps Installer.
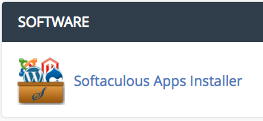
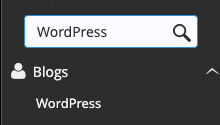
Step 3.: Go to the script what you want to import. In this example we use WordPress, so we search for WordPress.
Step 4.: Click on Import.
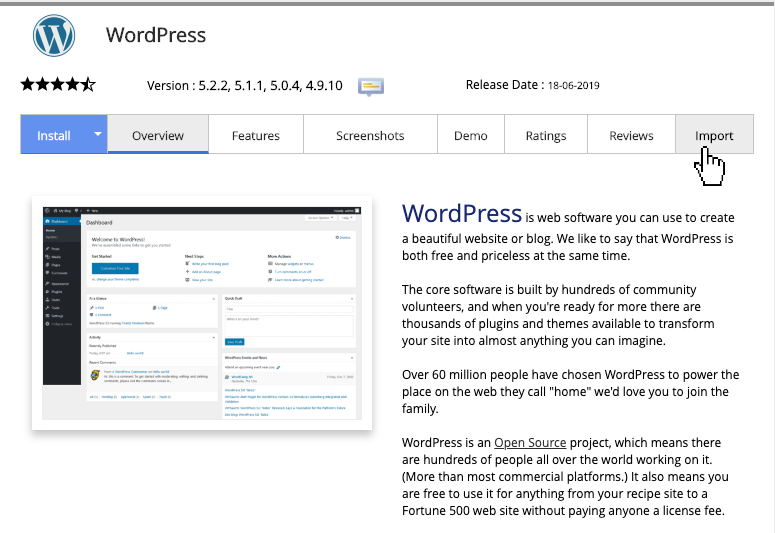
Step 5.: Select the location from the script, this will be the domain and, where applicable, subdirectory of this installation.
Step 6.: Click on ImportYour script has now been imported.
CMSHow do I install WP Maintenance Mode?WP Maintenance Mode is a handy WordPress plugin that allows you to temporarily put your website into maintenance mode. This is ideal if you want to make adjustments...Read the manual
How do I install WP Maintenance Mode?
WP Maintenance Mode is a useful WordPress plugin that allows you to temporarily put your website into maintenance mode. This is ideal if you want to make adjustments without visitors seeing the changes. Follow these steps to install the plugin:
Step 1: Log on to your WordPress dashboard
- Go to yourwebsite.nl/wp-admin.
- Log in with your admin username and password.
Step 2: Go to the plugin section
- In the left menu click on Plugins then on New Plugin.
Step 3: Find the plugin
- Type in the search field at the top right WP Maintenance Mode.
- The plugin should now appear in the results list.
Step 4: Install the plugin
- Click on the button Install Now at WP Maintenance Mode.
- Wait until the installation is complete.
Step 5: Activate the plugin
- Once the installation is complete, click on Activate.
Step 6: Configure the plugin
- Go to Settings in the left menu and click WP Maintenance Mode.
- Set the maintenance mode by setting Enabled . .
- You can also add a custom message that visitors will see, such as: "We are working on improvements. Come back later!"
Step 7: Save the settings
- Click Save or Save Changes to activate maintenance mode.
Your website is now in maintenance mode. Administrators can still view the site by logging in, but visitors only see the maintenance screen.
Do you need any questions or help? Please feel free to contact our support department
CMSHow do I install WordPress?WordPress is a free software package that many websites use. You can easily install it via Softaculous in cPanel. StepsStep 1. Log in to cPanel....Read the manual
How do I install WordPress?
WordPress is a free software package that many websites use. You easily install it via Softaculous in cPanel.
Step-by-step guide
Step 1. Log in to cPanel.
Step 2. Click under the category Software on Softaculous Apps Installer.
Step 3. You will be on a new page. In the left menu click on the search bar and type WordPress. Then click on the link WordPress.

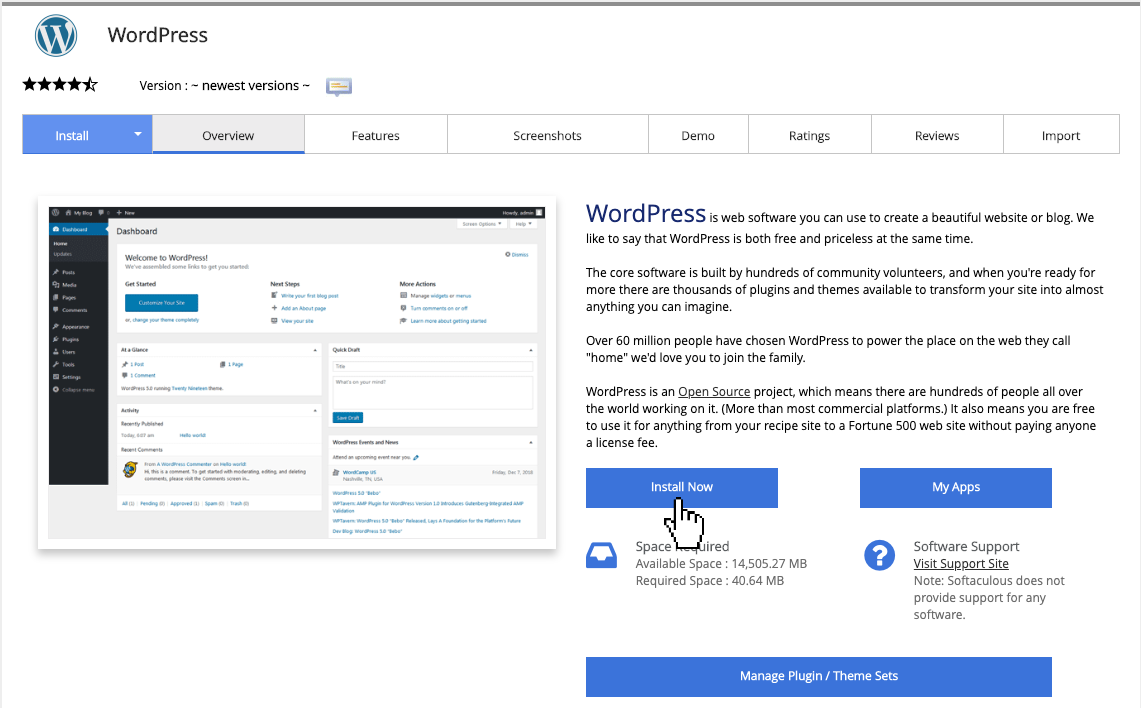
Step 4. You will see a short explanation about WordPress and an overview of all active WordPress installations. Click Install Now to install WordPress.
Step 5. Select On Domain the domain name on which WordPress must be installed.
Tip: If you want to install WordPress in a separate folder, enter Folder the desired name in. WordPress will then be accessible via http://gekozendomein.extensie/gekozenmap.
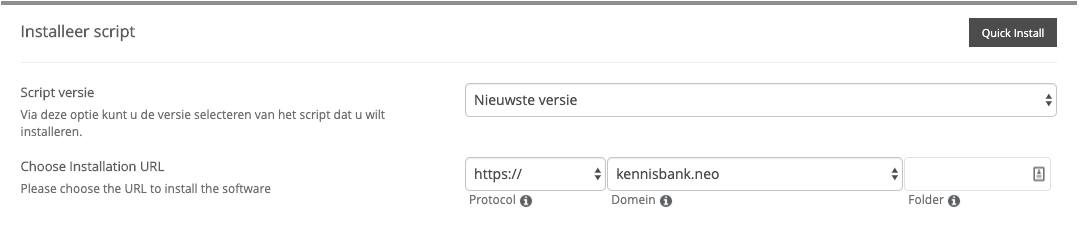
Step 6. Specify Website Name the name of the website on and at 'Website description' the description.
Step 7. Enter Admin username and Admin Password enter the desired username and password. Then enter the desired username. Admin Email enter the desired email address.
Step 8. Select all the options you want to customize. If you do not want to use a standard theme or plugins, you can go directly to step 9. You can always install plugins or themes later.
Step 9. Click Install to start the installation. After the installation has been completed, you will come to a new page with information about the new installation.
WordPress installation help
If you do not come out or want us to do the installation of WordPress then we will carry out this free of charge with the Plus package. We need the following data to run your installation:
Site name:
Description of the website:
Domain name:
You can e-mail this information to [email protected] for installation.
CMSHow do I create an extra WordPress user?Creating an additional user in WordPress is useful when you want to give multiple people access to your website, for example for editing, management...Read the manual
How do I create an extra WordPress user?
Creating an additional user in WordPress is useful when you want to give multiple people access to your website, for example for editing, management or other roles. Follow these simple steps to create a new user:
Step 1: Log on to your WordPress dashboard
- Go to the login page of your WordPress website (for example yourwebsite.nl/wp-admin).
- Enter your username and password and click Login.
Step 2: Go to the Users section
- In the left menu of your dashboard, search and click Users.
- Then click on Add New.
Step 3: Fill in the new user's data
- Username: Choose a username for the new user. This is the name they use to login.
- Email: Enter the user's email address. This is used for notifications and password recovery.
- First name (optional): Add the user's first name.
- Family Name (optional): Add the user's last name.
- Website (optional): Enter the user's website, if available.
Step 4: Choose a User Role
- With Role choose the role you want to assign to the new user. There are different roles that have different access levels:
- Administrator: Has full access to everything on the website.
- Editor: Can edit and publish messages and pages.
- Author: Can write, edit and publish your own messages.
- Writer: Can write and edit messages, but cannot publish.
- Reader: Can only read messages without any editing permissions.
Step 5: Please assign a password
- A strong password for the new user is automatically created, but you can modify it by clicking on the Generate password-click button.
- Make sure to share the password with the new user, unless you let the user reset the password himself.
Step 6: Send a notification (optional)
- Check the box Send the user an email about their account on, so that the new user receives an email with their login details.
Step 7: Add the user
- Click on the button Add new user to create the user.
Step 8: Login the user
- The new user will receive an e-mail with their login details (if you have enabled this option). They can now login to your website with the chosen username and password.
With these steps you can easily add a new user to your WordPress site. Make sure you assign the right role so that the user only has access to the parts of the website that are relevant to their task.
Do you need further help managing users or other settings in WordPress? Please feel free to contact us!
CMSHow do I create a staging environment with Softaculous?A staging environment is a convenient way to test changes on your website before putting them live. With Softaculous you can easily get a...Read the manual
How do I create a staging environment with Softaculous?
A staging environment is a convenient way to test changes on your website before putting them live. Softaculous allows you to easily create a staging environment. Follow the steps below.
Step 1: Log in to your cPanel
- Go to the login page of your cPanel (for example: yourwebsite.nl/cpanel).
- Enter your username and password and click Login.
Step 2: Open Softaculous
- Scroll in cPanel to the section Software or Apps Installer.
- Click Softaculous Apps Installer.
Step 3: Go to 'All Installations'
- In Softaculous, click on the list icon at the top right or choose Installations Overview.
- You now see a list of all the applications installed via Softaculous.
Step 4: Select the WordPress installation
- Find your WordPress installation in the list and click on it Staging icon (often an arrow or duplicate symbol) next to the installation.
Step 5: Configure the staging environment
- Choose a subdomain or directory where the staging environment is created.
- Examples include: staging.yourwebsite.nl or yourwebsite.nl/staging.
- Check that the correct WordPress version and settings are selected.
Step 6: Create the staging environment
- Click Create Staging or a similar button.
- Softaculous now copies the live website to the staging environment. This may take a few minutes.
Step 7: Access to the staging environment
- Once the process is complete, you will receive a link to the staging environment.
- Log in with the same login details as your live website.
Step 8: Test and do changes
- Use the staging environment to test new plugins, themes or other changes without affecting the live website.
Do you have any questions or are you not coming out? Please feel free to contact our support department.
CMS · cPanelHow do I change the PHP version in cPanel?It is possible to customize the PHP version of your website in cPanel to make it compatible with your applications...Read the manual
How do I change the PHP version in cPanel?
It is possible to modify the PHP version of your website in cPanel to make it compatible with your applications or plugins. Follow the steps below to change the PHP version of your website:
Step 1: Log in to your cPanel
- Go to the cPanel login page of your hosting provider (for example: yourwebsite.nl/cpanel).
- Enter your username and password and click Login.
Step 2: Find the 'Select PHP version' option
- In the cPanel dashboard, scroll down to the section Software.
- Click Select PHP version (or PHP Selector, depending on your hosting provider).
Step 3: Choose the desired PHP version
- You will see a dropdown menu with the available PHP versions. Choose the version you want to use for your website. Most hosting providers offer versions such as PHP 7.x, PHP 8.x, and sometimes older versions.
- Select the version that is compatible with your website or applications.
Step 4: Adjust the PHP settings (optional)
- After choosing the PHP version, you can also use the PHP Extensions customize your website. Check the extensions you need (such as
mbstring,gd,curl, etc.). - Some institutions, such as
memory_limitorupload_max_filesize, can also be adapted via the PHP Settings link if available in your cPanel.
Step 5: Save your changes
- Click Set as current version or Save (depending on your cPanel version) to set the new PHP version.
Step 6: Check your website
- After changing the PHP version, go to your website to make sure everything works correctly.
- If you are experiencing problems, you can restore the PHP version to a previous version or adjust the settings via the cPanel.
Important comments:
- Compatibility: Make sure that the PHP version you choose is compatible with your website and the plugins or themes used. Newer versions of PHP can often offer better performance and security, but some older applications may have problems with the latest versions.
- Errorlog: If you have any problems after changing the PHP version, check out the errorlog from your website to see which errors occur. This may help to resolve compatibility problems.
With these steps you can easily customize the PHP version for your website in cPanel and optimize the performance and compatibility of your website.
Do you have questions about PHP settings or other aspects of cPanel? Please feel free to contact us!
CMSHow do I change my WordPress admin password using Softaculous?Customizing the admin password of your WordPress website is easy via Softaculous. Follow the steps below to get this done quickly. Step 1: Log in...Read the manual
How do I change my WordPress admin password using Softaculous?
Adjusting the admin password of your WordPress website is easy via Softaculous. Follow the steps below to get this done quickly.
Step 1: Log in to your cPanel
- Go to the login page of your cPanel (for example: yourwebsite.nl/cpanel).
- Enter your username and password and click Login.
Step 2: Open Softaculous
- Scroll in cPanel to the section Software or Apps Installer.
- Click Softaculous Apps Installer.
Step 3: Go to 'All Installations'
- In Softaculous, click on the list icon at the top right or choose Installations Overview.
- You now see a list of all the applications installed via Softaculous.
Step 4: Select the WordPress installation
- Find your WordPress installation in the list and click on it pencil icon (edit) next to the installation.
Step 5: Adjust the admin password
- Scroll in the edit screen to the part Admin Account.
- Enter a new strong password Admin Password.
- Click at the bottom Save to make the changes.
Step 6: Test the new password
- Go to your WordPress dashboard via yourwebsite.nl/wp-admin.
- Log in with your username and the new password.
Your admin password has now been successfully modified.
Do you need any questions or help? Please feel free to contact our support department.
CMSHow do I set up an SMTP plugin to send email from my website?SMTP (Simple Mail Transfer Protocol) is a protocol for sending emails. By default, WordPress uses the PHP mail function to send emails, but this...Read the manual
How do I set up an SMTP plugin to send email from my website?
SMTP (Simple Mail Transfer Protocol) is a protocol for sending emails. By default, WordPress uses the PHP mail function to send emails, but this can lead to problems in delivering emails to recipients' inbox. By using an SMTP plugin, you can ensure that your emails are sent reliably and without problems.
Step 1: Install an SMTP plugin
There are several SMTP plugins available for WordPress. The most popular are WP Mail SMTP and Easy WP SMTP. Below we use WP Mail SMTP as an example.
- Log on to your WordPress dashboard.
- Go to Plugins > New Plugin.
- Search WP Mail SMTP.
- Click Install Now then on Activate.
Step 2: Configure the SMTP settings
- After installing and activating the plugin, go to Settings > WP Mail SMTP.
- Fill in the following fields:
- From Email Address: Enter the email address you want to use to send e-mails, for example
[email protected]. - By Name: Enter the name you want to display on sent emails (for example, the name of your company or website).
- Mailer: Select Other SMTP.
- From Email Address: Enter the email address you want to use to send e-mails, for example
Step 3: Fill in the SMTP server settings
- SMTP Host: Fill in the SMTP server from your email provider. This is usually
smtp.jouwwebsite.nlfor a personalised email. - SMTP Port: The port may vary, but the usual options are:
- Port 587 (recommended for secure email via TLS).
- Encryption: Choose between TLS (recommended) or SSL, depending on the requirements of your email provider.
- SMTP Username: This is usually your full email address (e.g.
[email protected]). - SMTP Password: This is the password of your email account or, in some cases, a app specific password that you can generate in your email provider's account settings.
Step 4: Test the settings
- Scroll down to the section Test email.
- Enter an email address to which you want to send a test email and click Send Mail.
- Check your inbox to see if the test email has been delivered successfully.
Step 5: Save the settings
- Click Save Settings to save the configuration of your SMTP plugin.
Step 6: Check the operation of your website email
- Now that your SMTP plugin is configured, your website should send emails via the specified SMTP server. For example, you can make a password reset request or fill out a contact form to test whether emails are sent correctly.
Important tips:
- Use a reliable email service: Choose a reliable email service provider (such as Gmail, Mailgun, SendGrid or your hosting provider) to fill in the SMTP data. Do not use free email services without proper configuration, as they often have limitations on the number of emails sent.
- Check Junk Settings: If your emails still end up in the spam folder, it may be necessary to SPF and DKIM-records set to your domain name provider for better delivery of emails.
With a well-configured SMTP plugin, you can ensure that your website sends reliable emails and prevent your messages from being marked as spam.
Do you need help with the
DomainsAdding an additional domainDepending on your hosting package, you can add multiple domain names in cPanel. You don't have to take a separate hosting package per website. Important...Read the manual
Adding an additional domain
Depending on your hosting package, you can add multiple domain names in cPanel. This way you do not have to take a separate hosting package per website.
Important
- For normal hosting packages you can use 1GB of working memory for PHP. For premium hosting packages this is from 2GB. If you have multiple websites on your hosting package, there is a chance that you will run against this limit faster.
- It is important that the domain name you add is actually registered and refers to the server that contains your hosting package.
Step-by-step guide
Step 1. Log in to cPanel.
Step 2. Under the category 'Domains', click on 'Extra domains'.
Step 3. Under the text 'Create an extra domain' enter the desired domain name. The fields for the subdomain and the base directory are automatically completed. You don't need to change that.
Step 4. If you want the new domain name to have a separate FTP account, you can check 'Create an FTP account linked to this additional domain'. This is not necessary, as you can simply log on to your cPanel login data via FTP.
Step 5. Click on 'Add Domain'. The additional domain name has now been created
DomainsHow do I change DNS settings in cPanel?Adjusting DNS settings in cPanel is essential to redirect your domain to the correct server or service. Follow these steps to...Read the manual
How do I change DNS settings in cPanel?
Adjusting DNS settings in cPanel is essential to redirect your domain to the correct server or service. Follow these steps to easily customize DNS settings:
Step 1: Log in to your cPanel
- Go to the login page of your cPanel (for example: yourwebsite.nl/cpanel).
- Enter your username and password and click Login.
Step 2: Go to the DNS zone editor
- Scroll in cPanel to the section Domains.
- Click Zone Editor.
Step 3: Select the domain you want to customize
- In the Zone Editor you will see a list of domains linked to your hosting account.
- Click Manage next to the domain you want to modify the DNS.
Step 4: Adjust the desired DNS records
- In the list of existing DNS records you can change the following types:
- A record: Refers your domain to an IP address (e.g. a server).
- CNAME record: Sets an alias for another domain.
- MX record: Ensures that emails are sent to the correct mail server.
- TXT record: Used for verification or specific settings such as SPF, DKIM or Google verification.
- Click Edit next to the record you want to change.
Step 5: Add new DNS records (optional)
- Click Add Record if you want to create a new record.
- Fill the type of record, the name (for example: www or @) and the corresponding value.
Step 6: Save the changes
- Click Save or Save Record to make your adjustments.
Step 7: Wait until the changes become active
- DNS changes typically take 4 to 24 hours to be implemented worldwide (DNS-propagation).
Tip: Check your changes via a DNS check tool (for example: dnschecker. org) to verify that everything is set correctly.
Do you need any questions or help adjusting your DNS? Please feel free to contact our support department.
DomainsHow do I set up DKIM?DKIM (DomainKeys Identifyed Mail) is an email security standard that helps to verify whether an email actually comes from the sender and whether the message...Read the manual
How do I set up DKIM?
DKIM (DomainKeys Identifyed Mail) is an email security standard that helps to verify whether an email actually comes from the sender and whether the message has not been changed during transport. Setting up DKIM correctly helps to protect your email domain from spoofing and phishing attacks. Follow the steps below to set up DKIM:
Step 1: Log in to your cPanel
- Go to the login page of your cPanel (for example: yourwebsite.nl/cpanel).
- Enter your username and password and click Login.
Step 2: Go to the email section
- Scroll down to the area Email in your cPanel dashboard.
- Click Email Authentication (E-mail verification).
Step 3: Activate DKIM
- You can see two important options: SPF and DKIM.
- Click Set or Enable to the option DKIM.
- cPanel automatically generates the required DKIM records for your domain.
Step 4: Add the DKIM records to your DNS
- After DKIM is enabled, you need to add the generated DKIM records to your DNS settings.
- Go to the DNS Zone Editor in cPanel.
- Click Zone Editor under the part Domains.
- Find your domain and click Manage.
- Click Add Record.
- Choose TXT as record type and add the DKIM value you got from cPanel.
- Add the name of the record (for example: default._domainkey.jouwdomain.nl) and the value (the long DKIM key).
- Click Save.
Step 5: Test the DKIM settings
- After the changes have been made, you can test the DKIM settings via an online DKIM checker (for example: dkimvalidator.com).
- This helps to verify that the setting has been implemented correctly.
Step 6: Waiting for DNS Propagation
- Please note that it may take several hours to 24 hours to complete the DNS changes.
By switching on DKIM, you increase the credibility of your e-mails and improve the chances that they will enter the recipient's inbox correctly.
Do you need help setting up DKIM or are you not coming out? Please feel free to contact our support department.
DomainsHow do I set up a redirect?You can easily set up a referral via cPanel. This is useful when you have multiple domain names that have to redirect to a single website or...Read the manual
How do I set up a redirect?
You can easily set up a referral via cPanel. This is useful when you have multiple domain names that need to be redirected to a single website or when you want to redirect a domain name to an external website.
Step-by-step guide
Step 1. Log in to cPanel.
Step 2. Under the category 'Domains', click on 'Transfers'.
Step 3. On the new screen you have a choice of two different types: 'Definitive (301) ' and 'Temporary (302). If the redirection is not temporary, then select the first type, otherwise the second.
Step 4. Choose which domain name you want to redirect. You can also choose to refer all the domain names you have in cPanel to the same address. If you want to, select '** All public domains **'. In the example, we choose to refer to a single domain name.
Step 5. Enter the destination under 'Transfers to', for example http://www.google.nl.
Step 6. Then indicate below whether you want your domain name to be redirected to and/or without 'www.'.
Step 7. Set a check mark for 'Redirection with joker sign' if you want everything to be referred after the '/'.
Example: if you want to redirect 'yourdomain.com' to 'yourdomain.nl' and you use a redirect with a joker sign, 'yourdomain.com/page/subpage' is referred to 'yourdomain.nl/page/subpage'.
Step 8. Click "Add."
Removing a redirect
To remove a redirect, click on 'Remove' on the corresponding redirect. The link will then be deleted immediately.
DomainsHow do I add a subdomain?If you want to clone, test or use another CMS like WordPress on your website, it can be useful to use a subdomain for this...Read the manual
How do I add a subdomain?
If you want your website clones, tests or some other CMS as WordPress to use on your website it may be useful to use a subdomain for this. In a subdomain you can think of support.drechthosting.nl, where support the subdomain is.
Important
It is important that the subdomain (or wildcard) points DNS record to the server if you want to use a subdomain.
Step-by-step: adding a subdomain
Step 1: Log in to cPanel.
Step 2: Go underneath the Domains catagory to Subdomains.
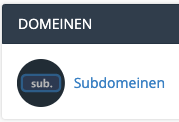
Step 3.: Fill the desired subdomain in, select it domain what you create the subdomain for, and select the base directoryThe base directory is the folder in your package where the website files should be placed, or the installation should be executed.
Once you see the screen below, the subdomain has been successfully created!

For example, you can now install WordPress, use the subdomain for cloning, testing or staging.
DomainsWhich name servers should I use?The default name servers for our shared hosting are: ns1.drechthosting.nlns2.drechthosting.nlns3.drechthosting.nl If you purchase a server from us, you will receive the right name servers by email...Read the manual
Which name servers should I use?
The default name servers for our shared hosting are;
ns1.drechthosting.nl
ns2.drechthosting.nl
ns3.drechthosting.nl
If you purchase a server from us you will receive the correct name servers by e-mail.
DomainsHow do I create a domain alias?You create a domain alias when you want to display the content of a single website on several domain names. That website must be...Read the manual
How do I create a domain alias?
You create a domain alias when you want to display the content of a single website on multiple domain names. That website must be on your hosting package. This is useful, because you do not have to maintain a separate website for each domain name.
Important
- The domain name you want to add must be registered and refer to the IP address of the server on which your hosting package is located. If you do not know which IP address this is, please contact our helpdesk. We are happy to help you!
Step-by-step guide
Step 1. Log in to cPanel.
Step 2. Under the category 'Domains', click on 'Aliassen'.
Step 3. Under 'Domain' enter the desired domain name and click 'Add Domain'. The domain alias is now created.
DomainsHow do I set up a redirect for my domain name?You can easily set up a referral via cPanel. This is useful when you have multiple domain names that have to redirect to a single website or...Read the manual
How do I set up a redirect for my domain name?
You can easily set up a referral via cPanel. This is useful when you have multiple domain names that need to be redirected to a single website or when you want to redirect a domain name to an external website.
Step-by-step guide
Step 1. Log in to cPanel.
Step 2. Under the category 'Domains', click on 'Directions'.
Step 3. On the new screen you have a choice of two different types: 'Definitive (301) ' and 'Temporary (302) '. If the redirection is not temporary, then select the first type, otherwise the second.
Step 4. Choose which domain name you want to redirect. You can also choose to refer all domain names you have in cPanel to the same address. If you want to, select '** All public domains **'. In the example, we choose to refer to a single domain name.
Step 5. Enter the destination under 'Transfers to', for example http://www.google.nl.
Step 6. Then indicate below whether you want your domain name to be redirected to and/or without 'www.'.
Step 7. Set a check mark for 'Redirection with joker sign' if you want everything to be redirected after the '/'.
Example: if you want to redirect 'yourdomain.com' to 'yourdomain.nl' and you use a redirect with a joker sign, 'yourdomain.com/page/subpage' is referred to 'yourdomain.nl/page/subpage'.
Step 8. Click 'Add'.
Removing a redirect
To remove a redirect, click on 'Remove' on the corresponding redirect. The link will then be deleted immediately.
EmailSetting up email in ThunderbirdDo you want to set up your email in Thunderbird, one of the most popular email clients? With this manual you can quickly and easily configure your email...Read the manual
Setting up email in Thunderbird
Do you want to email set up in Thunderbird, one of the most popular email clients? With this manual you can quickly and easily Configure Mail in Thunderbird for flawless communication. Thunderbird is free to download and offers comprehensive features for all your email needs.
What is Thunderbird?
Thunderbird is a free and open-source email client developed by Mozilla. It is a user-friendly application that allows you to manage multiple email accounts, including those of your hosted cPanel domain.
Where can I download Thunderbird?
You can download Thunderbird from the official website:
- Download Thunderbird
Click on the button Free Download, follow the installation instructions and start the application.
How do I set up an email account in Thunderbird?
1. Start Thunderbird
- Open Thunderbird after installation.
- On the first start, a window will appear where you can add a new email account.
2. Add your email account
- Click Configure Mail or Create a new mail account.
- Enter your name, e-mail address (for example [email protected]) and the password you received from your hosting provider.
3. Choose the configuration method
Thunderbird automatically tries to retrieve the settings. If this does not work, you can enter the data manually:
- Select Manual configuration.
- Please enter the following data, depending on your preference for IMAP.
For IMAP (recommended):
- Incoming server:
- Type: IMAP
- Server address: mail.jouwdomain.nl
- Port: 993 (with SSL)
- Verification: Password, normal
- Outgoing server (SMTP):
- Server address: mail.jouwdomain.nl
- Port: 465 (with SSL)
- Verification: Password, normal
4. Save the settings
- Click Done to complete the configuration.
- Thunderbird now checks the settings and synchronizes your mailbox.
Common problems and solutions
- Cannot connect to server: Make sure your username and password are entered correctly.
- E-mails are not sent: Check the settings for the outgoing server (SMTP).
- SSL Certificate Problems: Please contact your hosting provider to check that the SSL certificate is installed correctly.
Why use Thunderbird?
- Free and open source.
- Support multiple email accounts.
- Intuitive interface with advanced functions.
- Available on Windows, macOS and Linux.
Conclusion
The setting up your mail in Thunderbird is simple and fast. By using Thunderbird, you have a powerful email client to efficiently manage your email accounts. Follow the above steps and enjoy trouble-free communication!
Do you need help setting up your email in Thunderbird? Take contact On with Drechthosting!
EmailHow do I block an unwanted sender in cPanel?Blocking unwanted senders in cPanel is an effective way to prevent unwanted e-mails from specific senders. Via the email settings of cPanel...Read the manual
How do I block an unwanted sender in cPanel?
Blocking unwanted senders in cPanel is an effective way to prevent unwanted e-mails from specific senders. You can easily block emails from certain senders via cPanel's email settings. Follow the steps below to block a sender:
Step 1: Log in to your cPanel
- Go to the login page of your cPanel (for example: yourwebsite.nl/cpanel).
- Enter your username and password and click Login.
Step 2: Go to the email section
- Scroll down to the area Email in your cPanel dashboard.
- Click Mail Filter or Global Email Filters (depending on your version of cPanel).
Step 3: Create a new filter
- Click Create a new filter to create a new line that blocks messages from a specific sender.
- Please give the filter a name, for example: "Block Unwanted Sender" .
Step 4: Set the filter criteria
- Choose on Filter lines the option From in the list of available criteria.
- Enter the email address of the sender you want to block. For example: [email protected].
- If you want to block multiple senders, add their email addresses, separated by a comma.
Step 5: Choose the filter action
- With Action choose Delete message or Move to Spam.
- If you choose to delete the message, the email will be completely ignored. If you choose "Move to Spam," the email will be placed in the junk folder so you can check it later.
Step 6: Save the filter
- Click Save to add the filter.
- The filter will now be active and will block or move emails from the specified sender to the junk folder.
Step 7: Regularly check your junk
- Occasionally check the junk folder to make sure that there are no legitimate emails in it.
- If a legitimate e-mail is falsely marked, you can add the sender to your Whitelist to prevent this in the future.
Step 8: Remove the filter (optional)
- If you want to remove the blockage of a sender, you can remove the filter by Mail Filter manage your created rules and remove or edit the filter.
By following these steps, you can easily block unwanted senders in cPanel and keep your inbox clean of spam.
Do you need help blocking a sender or are you not coming from somewhere? Please feel free to contact our support department.
EmailHow do I optimise my spam filter in cPanel?Optimizing your spam filter helps to block unwanted emails (spam) before they reach you inbox. In cPanel you can easily set spam filters...Read the manual
How do I optimise my spam filter in cPanel?
Optimizing your spam filter helps to block unwanted emails (spam) before they reach you inbox. In cPanel, you can easily set and customize spam filters to better protect your mailbox from unwanted messages. Follow the steps below to optimize your spam filter:
Step 1: Log in to your cPanel
- Go to the login page of your cPanel (for example: yourwebsite.nl/cpanel).
- Enter your username and password and click Login.
Step 2: Go to the email section
- Scroll down to the area Email in your cPanel dashboard.
- Click SpamAssassinSpamAssassin is the built-in spam filter in cPanel that you can configure.
Step 3: Enable SpamAssassin
- If SpamAssassin is not yet enabled, click on Enable to activate the spam filter.
- When SpamAssassin is enabled, incoming emails are automatically scanned for suspicious features of spam.
Step 4: Adjust the spam threshold
- Bottom SpamAssassin configuration you see an option to the Junk threshold The Commission's proposal is based on the following principles:
- This determines how strict SpamAssassin should be when marking a message as spam.
- Low: Less strict, with potentially more legitimate emails marked as spam.
- Average: A balance between security and false positives.
- High: Stricter filter settings that block most spam, but it can also block some legitimate emails.
- Choose the desired threshold setting depending on how strict you want to set the spam filter.
Step 5: Check and configure the Junk Trap folder
- SpamAssassin can place suspicious emails in a special folder, often called Junk or Spam.
- Go to the settings of your email client (such as Roundcube or Webmail) to check the junk folder.
- If a legitimate email is wrongly marked as spam, you can mark the email as Not Junk to improve the filter.
Step 6: Use additional settings and rules
- SpamAssassin offers advanced configuration options that you can use to set up specific spam filters, such as blocking email addresses or domains that you often experience as spam.
- Click SpamAssassin configuration to manage advanced settings such as Header Subject Rules, Blacklistsand Whitelists.
Step 7: Test the Junk Filter Settings
- After adjusting the settings, you can send some test emails to check that the spam filter is working properly.
- You can also use an online spam test tool to test the effectiveness of your filter.
Step 8: Regularly check the spam folder
- Regularly check the Spam- or Junk-map to make sure there are no legitimate e-mails in it.
- Add reliable senders to you Whitelist to prevent their e-mails from being falsely marked as spam.
By following these steps, you can effectively optimize your spam filter in cPanel and reduce the risk of unwanted email.
Do you need help configuring your spam filter or are you not coming out somewhere? Please feel free to contact our support department.
EmailHow do I change my email password in cPanel?If you have lost the password of your created email address or simply want to change it because of security, you can do it via cPanel....Read the manual
How do I change my email password in cPanel?
If you have lost the password of your created email address or simply want to change it because of security, you can do it via cPanel. In this article we explain how to change the password of your email address via cPanel.
Step-by-step guide
Step 1. Log in to cPanel.
Step 2. Click underneath category E-mail on Email Accounts.
Step 3. Click below Email Account, next to your e-mail address on Password.
Step 4. Enter a new password now Password and Password (again)
Step 5. Click Change password
Step 6. Hooray! The password of your email address has been changed.
EmailHow do I set up an automatic reply?Step plan Step 1. Log in to cPanel. Step 2. Click under the category ' E-mail' on ' Automatic Answerers' Step 3. Click ' Automatic Answerer'. You will see the...Read the manual
How do I set up an automatic reply?
Step-by-step guide
Step 1. Log in to cPanel.
Step 2. Under the category 'E-mail', click on 'Automatic Answerers'.
Step 3. Click on 'Add Automatic Answerer'. You will see the following fields:
- Interval. Enter '0' here, as the automatic response will then be sent immediately.
- Email. Enter the e-mail address from which the automatic response is sent.
- Domain. Select here the domain name from which the automatic response is sent.
- From. Enter here the name the recipient will see, for example your own name or your company name.
- Subject matter. Enter the subject of the e-mail here, for example 'We are on holiday'.
- This message contains HTML. Check this if you want to send a message with HTML. If you don't know how this works, don't check it.
- Header. Enter the message content here.
Step 4. Select a date if you want the automatic response to start and stop automatically at a given date. If you want it to start immediately and not start automatically, then you don't have to change anything.
Step 5. Click on 'Maken/Modify' to create the automatic response.
EmailHow do I set up email on my iPhone?Now that you have your own e-mail address, I'm sure you'd like to be reachable anywhere. That's understandable and no problem.Read the manual
How do I set up email on my iPhone?
Now that you have your own e-mail address, I'm sure you want to be accessible everywhere. That's understandable and no problem. We explain how to set up your e-mail address on the iPhone.
Step 1. Go to your iPhone Settings > Passwords and accounts and tap New Account.
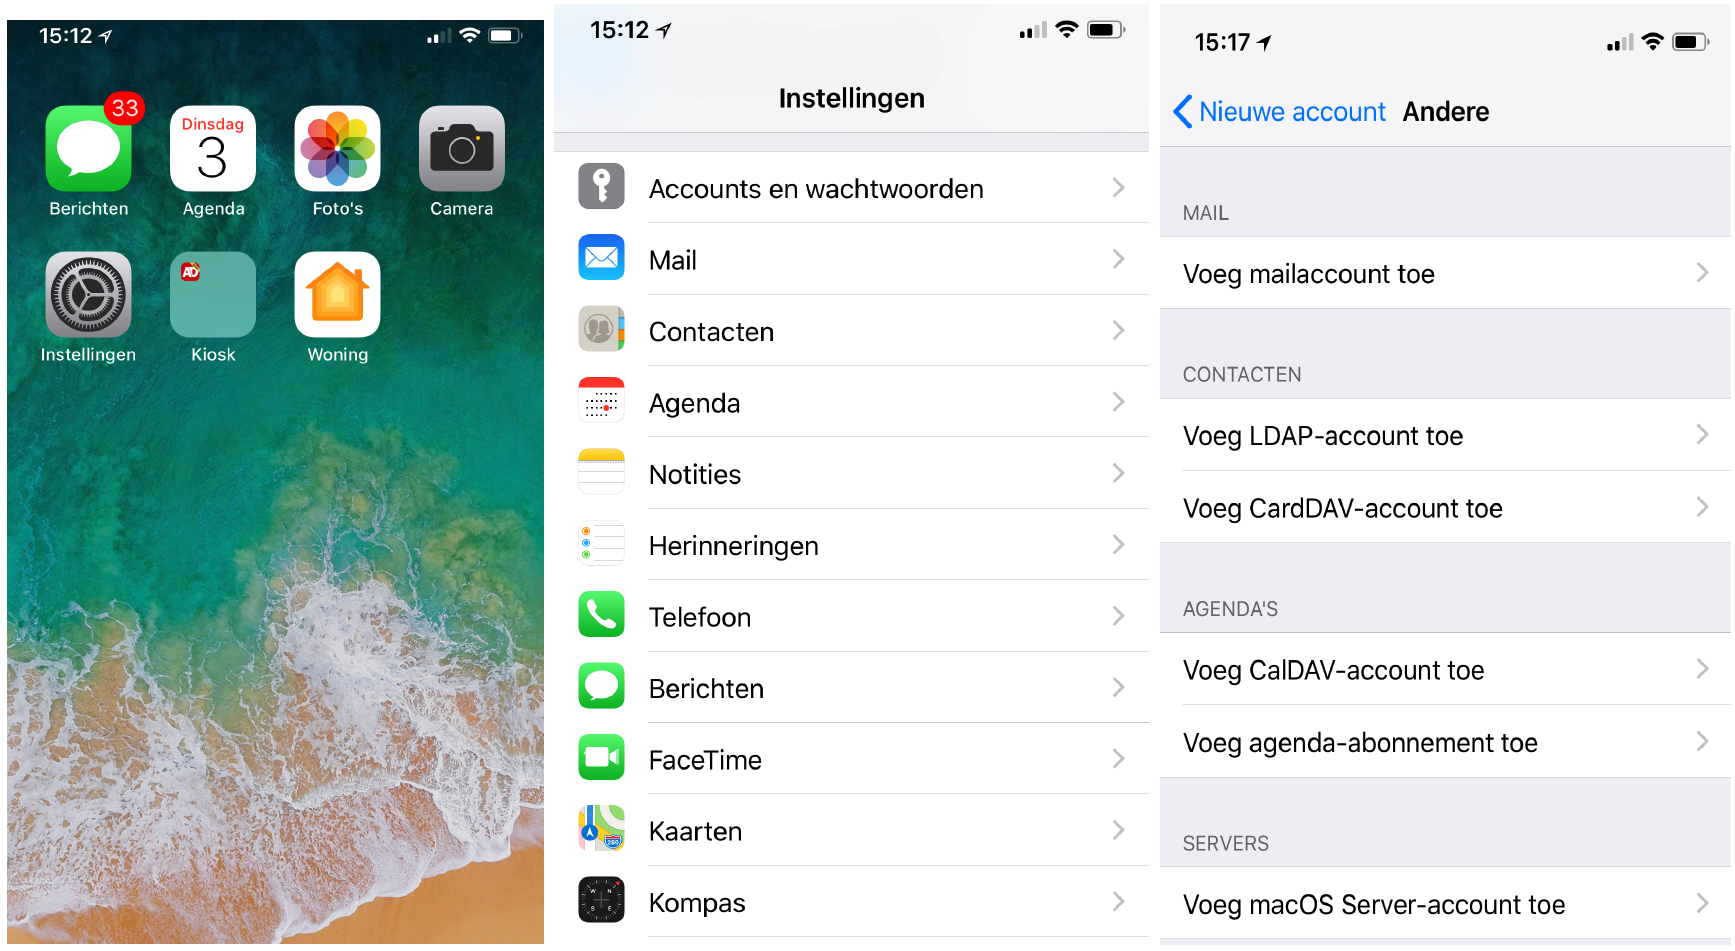
Step 2. Choose on the new screen for Other and tap Add mail account.
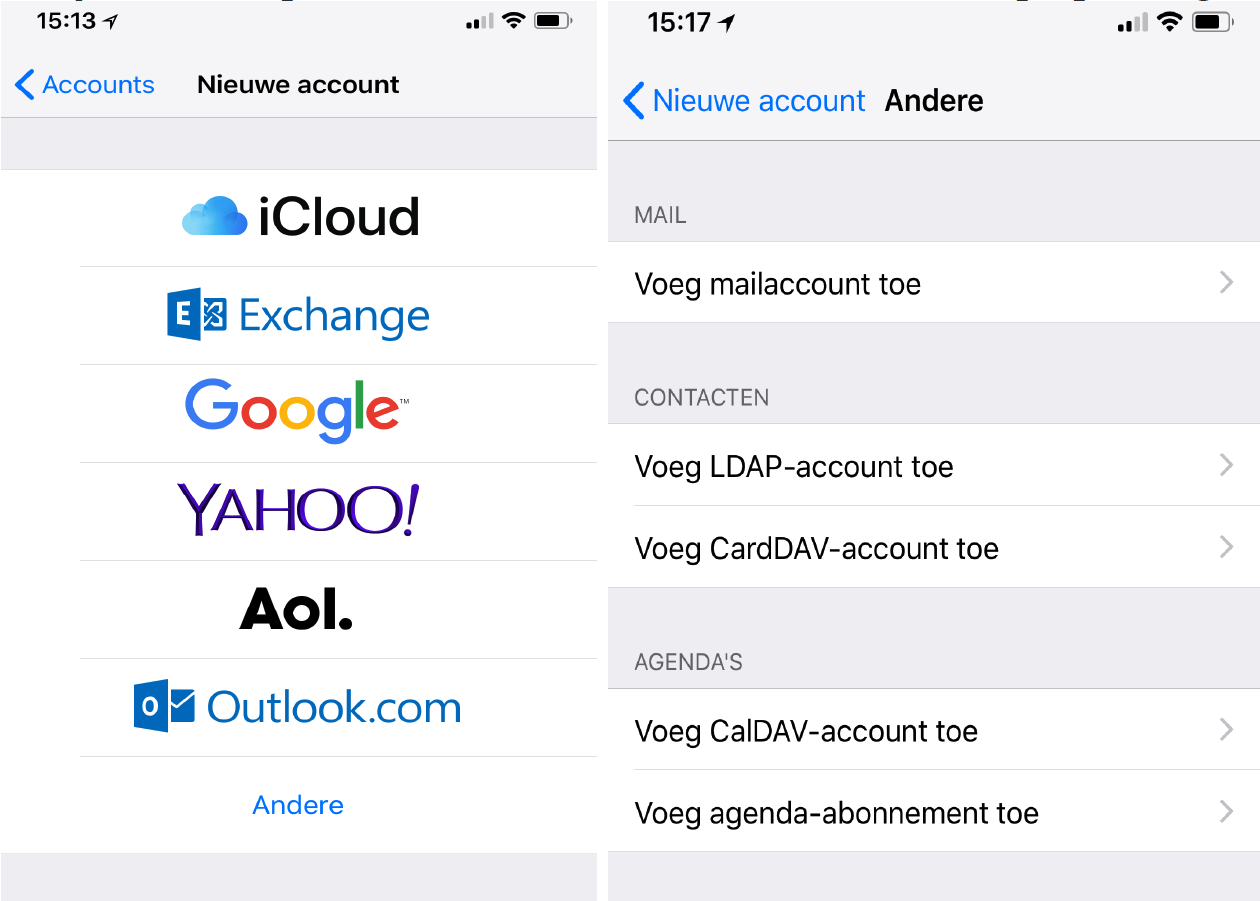
Step 3. Enter the requested data. The email address and password must be the same as the email address you added to us. Tap Next.
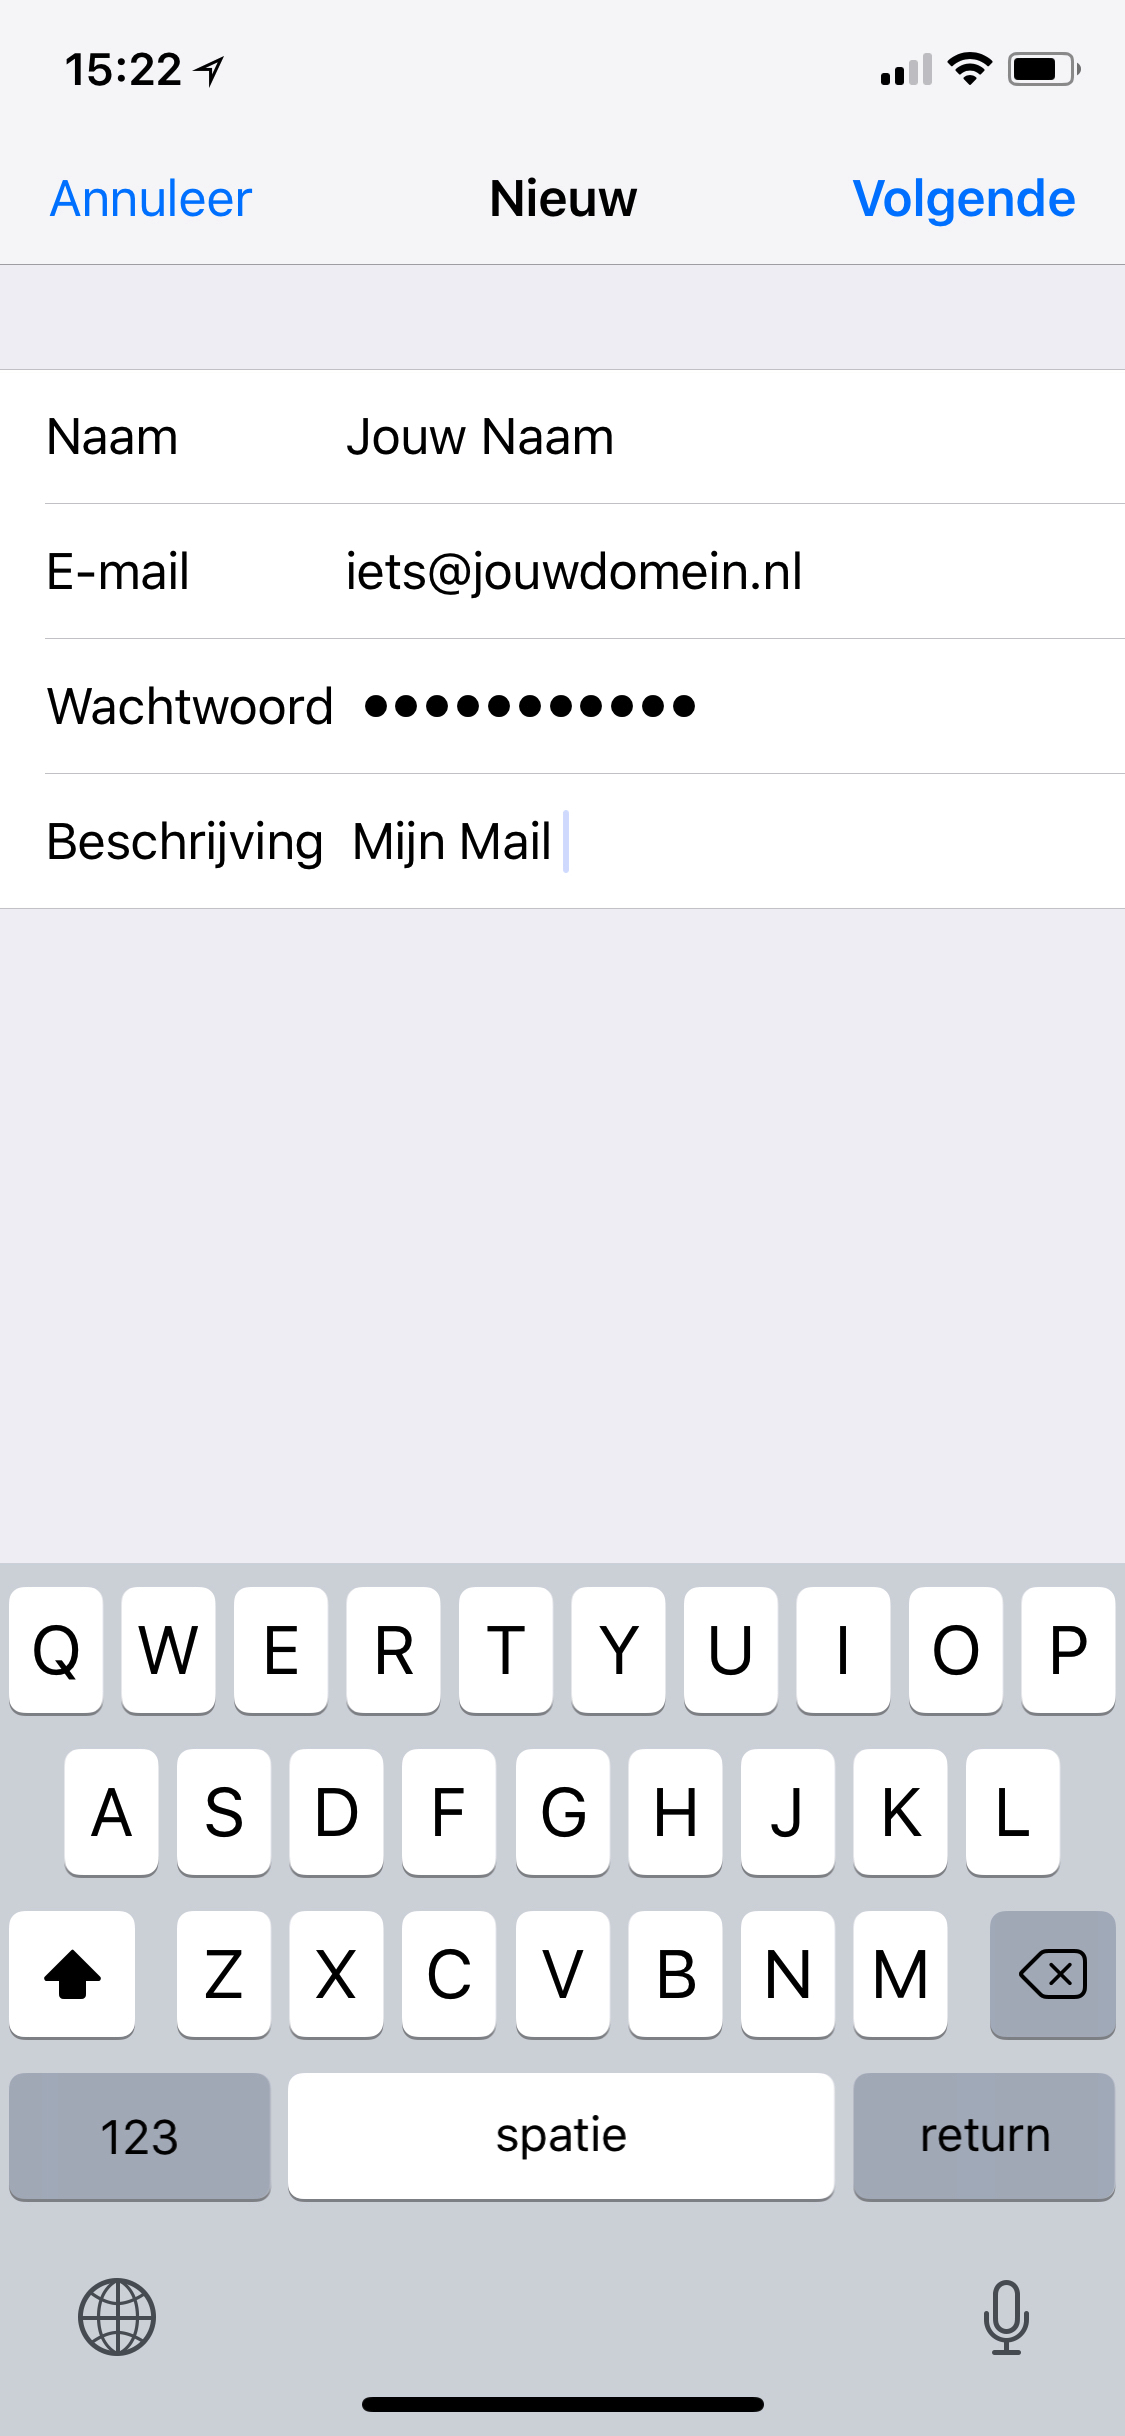
Step 4. On the new screen you can choose from IMAP and POP. If you choose POP, then all email from the server will be deleted and downloaded to your iPhone. This way the email is no longer reachable from other devices. Therefore, it is better to do so on IMAP ♪ To stand ♪ Server incoming mail and Server outgoing mail enter the following:
- Hostname: mail.domain is "domain" your domain name.
- Username: Here you enter the e-mail address you created.
- Password: Here you enter the password that pertains to the email address.
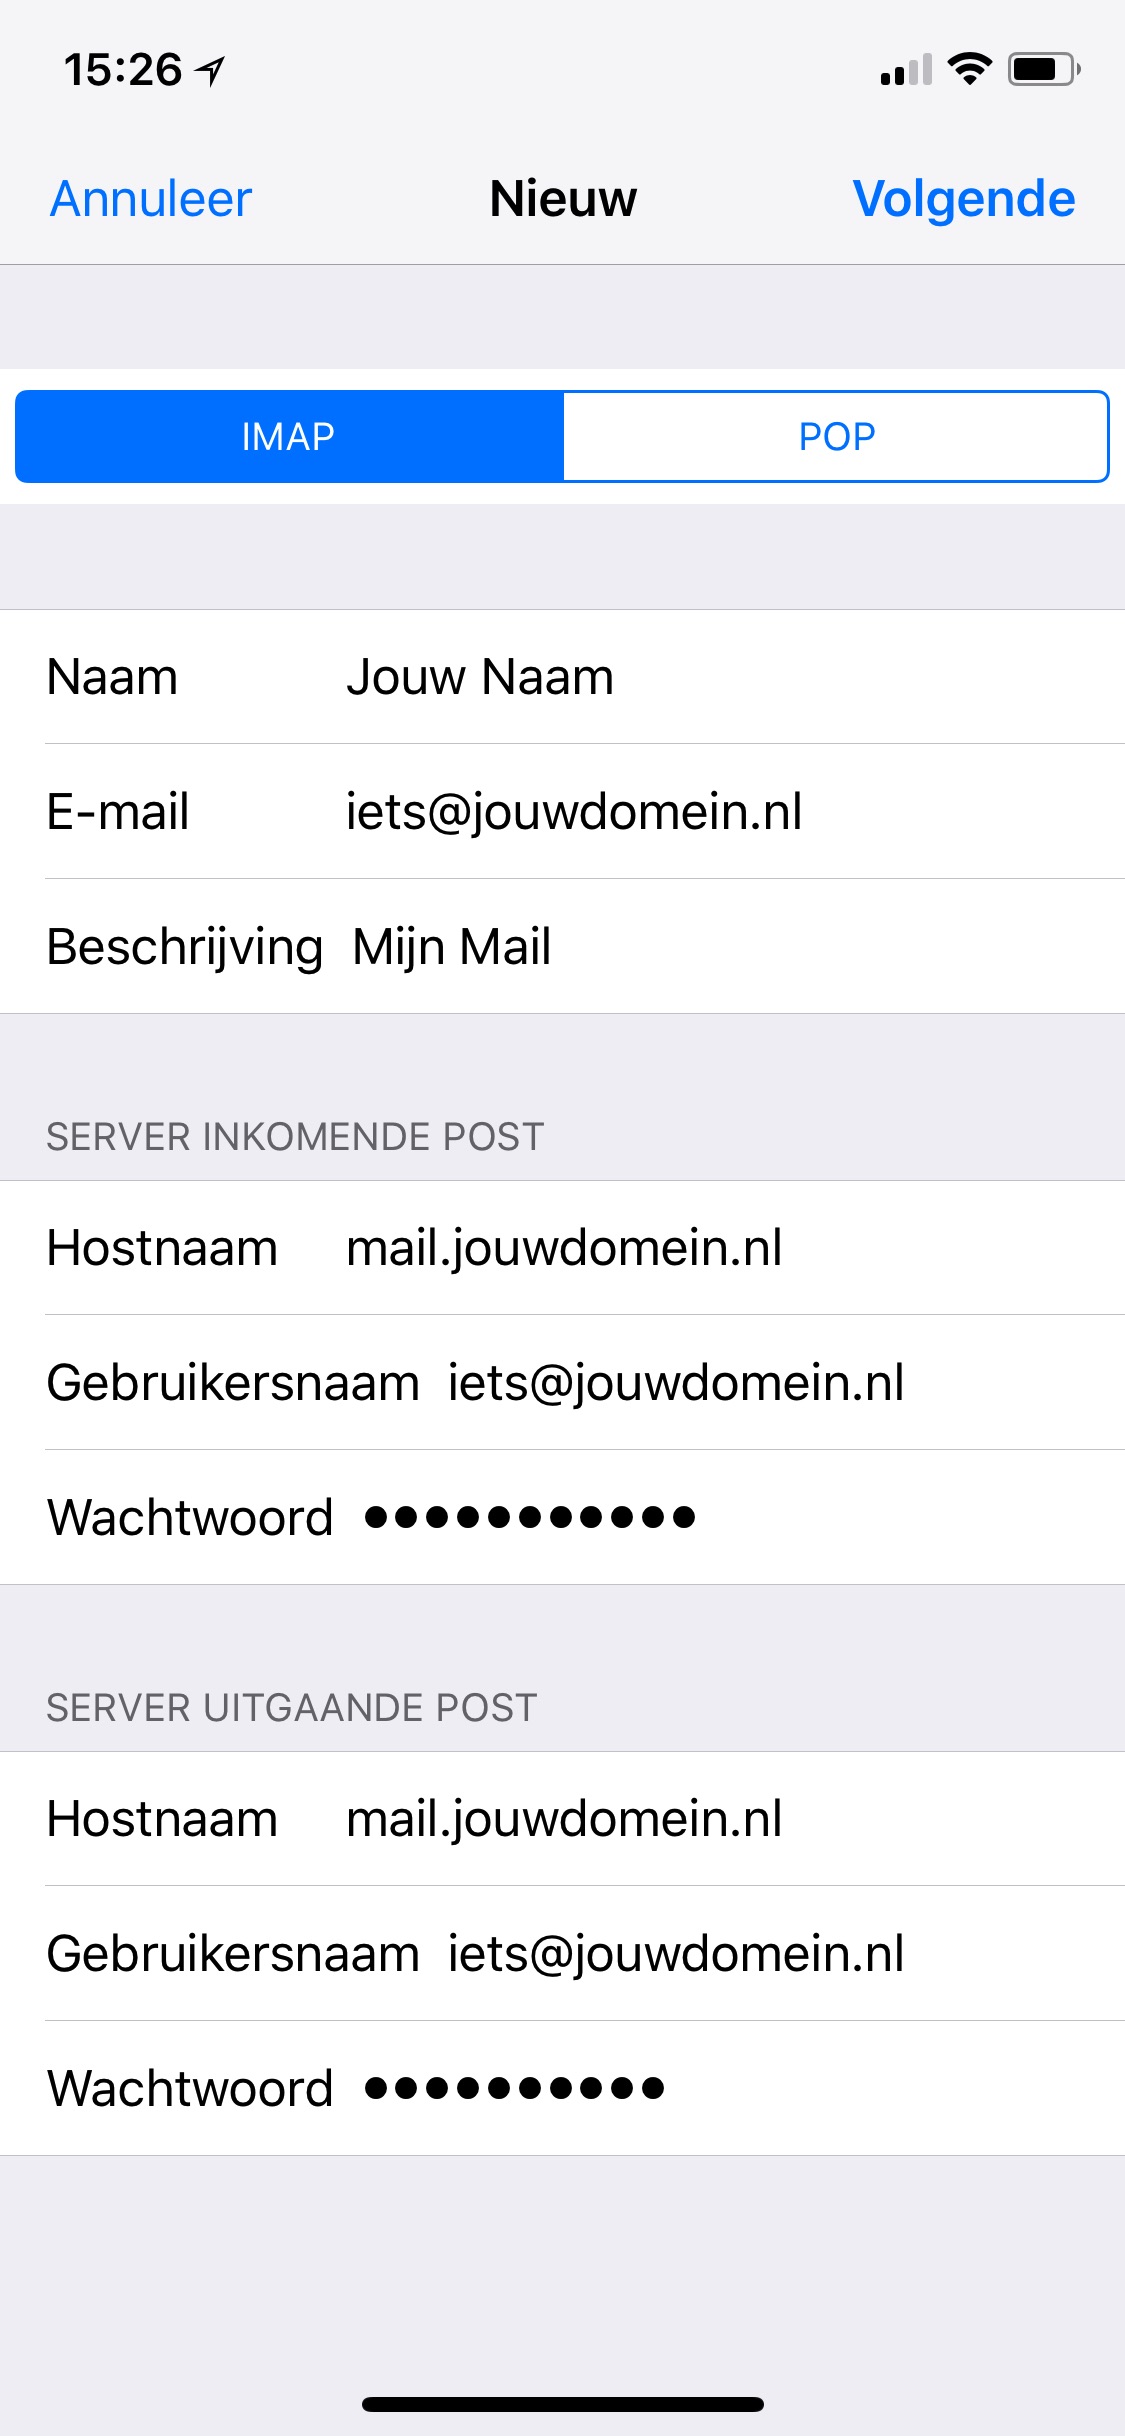
Please note: Despite that, server outgoing mail optional condition it is with us mandatory enter it. These are the same data as the server incoming mail.
Step 6. Tap Up NextThe email address is now set to your iPhone.
EmailHow do I set up my email account in Apple Mail?You can view your e-mail anywhere in the world via the webmail. However, it may be nice to add your e-mail address to the e-mail...Read the manual
How do I set up my email account in Apple Mail?
You can view your e-mail anywhere in the world via the webmail. However, it may be nice to add your e-mail address to the e-mail program on your laptop, desktop and/or smartphone. In this article we explain how to set up your e-mail address in Mail, on a MacOS device. If you want to add an e-mail address to an iOS device, we refer to the iPhone article.
Step 1. Start Mail.
Step 2. Click at the top of the menu bar Mail then on Add Account.
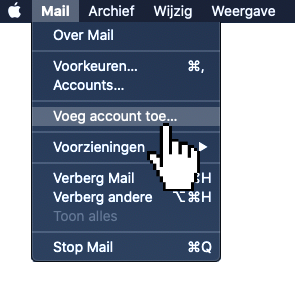
Step 3. Then click on Other Mail Account...
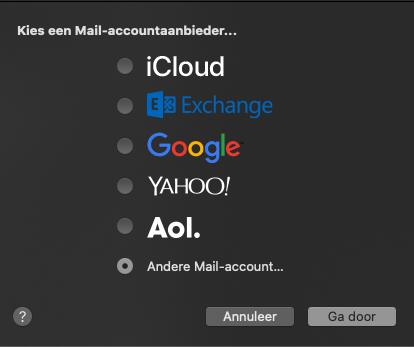
Step 4. Enter a name now, along with the email address you created and the password you set for it. In this example, we use the non-existent domain knowledge bank.neo. Then click Log in.

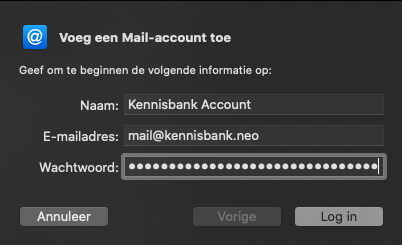
Step 5. You will be notified that the audit of the account name or password failed. That's okay. You enter the details of your email address now
- UsernameHere you enter the e-mail address you created with us.
- Account Type. Leave your IMAP here if you want to use IMAP (recommended)
- Server incoming mailHere you enter the mail server you want to use. If you use the default mail servers of Neostrada, this is mail.domain. extension, replacing your domain with your domain, and extension by the extension (e.g. .nl/.be/.com)
- Server Outgoing MailHere you enter the mail server you want to use. If you use the default mail servers of Neostrada, this is mail.domain. extension, replacing your domain with your domain, and extension by the extension (e.g. .nl/.be/.com)
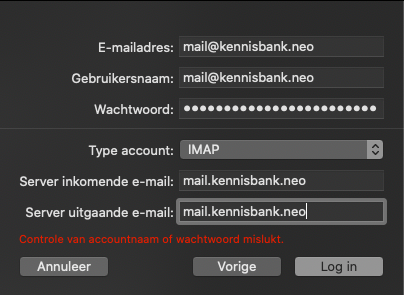
Step 6. Click Log in. You will now see a screen which you ask if you Mail and Notes wants to sync. Make your choice and click Done.
Hooray! Your email address has now been added to Apple Mail.
EmailHow do I set up my email account in Outlook?You can view your e-mail anywhere in the world via our webmail. Still, it can be nice to add your e-mail address to the...Read the manual
How do I set up my email account in Outlook?
You can view your email anywhere in the world via our webmail. However, it may be nice to add your email address to the email program on your laptop, desktop and/or smartphone. In this article we explain how to set up your email address in Outlook.
Also read: How do I set up my email on my Android phone?
Step-by-step guide
Step 1. Start Lookout.
Step 2. Click Stock.
Step 3. Click Add Account.
Step 4. Select Manual setting or additional server types and click on Next.
Step 5. Select POP or IMAP and click on Next.

Step 6. Fill in the following details:
-
Name: Here you enter the name of your account.
-
Email address: Here you enter your e-mail address.
-
Account type: Choose whether you want to use POP or IMAP.
-
Server for incoming email: Enter 'mail.domain.extension' here.
-
Outbound mail server (SMTP): Enter 'mail.domain.extension' here.
-
Username: Enter your email address here
-
Password: Enter the password of your e-mail address here.
Also read: How do I create an email address?
Step 7. Click More Settings.
Step 8. Go to the Server tab for outgoing mail.
Step 9. Check the option For the server for my outgoing email (SMTP) is verificatie required On.

Step 10. Go to the tab Advanced.
Step 11. Fill at incoming port 993 (IMAP) or 995 (POP3) and set up security SSL.
Step 12. Fill in at the outgoing port 465 and put the security on SSL.
Step 13.Click on OK.
Step 14. Click Next and Complete
Step 15. Your email has now been added to Outlook and you can get started with it.
EmailHow to whitelist a sender in cPanel?Whitelisting a sender in cPanel ensures that e-mails from that sender always come into your inbox, even if they are otherwise like...Read the manual
How to whitelist a sender in cPanel?
Whitelisting a sender in cPanel ensures that emails from that sender always enter your inbox, even if they are otherwise marked as spam. This is useful if you do not want to miss important emails from a legitimate sender. Follow the steps below to add a sender to the whitelist in cPanel:
Step 1: Log in to your cPanel
- Go to the login page of your cPanel (for example: yourwebsite.nl/cpanel).
- Enter your username and password and click Login.
Step 2: Go to the email section
- Scroll down to the area Email in your cPanel dashboard.
- Click Mail Filter or Global Email Filters (depending on your cPanel version).
Step 3: Create a new filter
- Click Create a new filter to set a new filter line.
- Give the filter a name, for example: "Whitelist important sender."
Step 4: Set the filter criteria
- With Filter rules choose From from the available options.
- Enter the email address of the sender you want to whitelist. For example: [email protected].
- You can also whitelist a domain by for example @domain. com enter so that all e-mails of that domain are allowed.
Step 5: Choose the filter action
- Choose on Action before Do not filter or No actionThis ensures that the email is not marked as spam and always ends up in your inbox.
Step 6: Save the filter
- Click Save to set the filter.
- E-mails from the specified sender(s) are no longer filtered and always enter your inbox.
Step 7: Check your inbox
- Check your inbox to see if e-mails from the whitelisted sender(s) are delivered correctly.
Step 8: Manage or remove the filter (optional)
- If you want to edit or delete the whitelist, go back to the Mail Filter-section and manage your existing filters.
By following these steps, you can ensure that important e-mails from certain senders always end up in your inbox, without ending up in the spam folder.
Do you need help whitelisting a sender or are you not coming from somewhere? Please feel free to contact our support department.
EmailWhy is my email marked as spam?It can be frustrating if the e-mails you send end up in the recipient's SPAM folder. This will make sure that you have important messages...Read the manual
Why is my email marked as spam?
It may be frustrating if the emails you send end up in the recipient's SPAM folder. This will make sure your important messages don't come in right. In this article we explain why your email can be marked as SPAM and how to prevent this.
Why is my email marked as SPAM?
There are several reasons why your email can be seen as SPAM. Here are the most common causes:
- Wrong mail settings
- If your email domain is not set correctly, email servers may consider your messages suspicious. This can happen if you SPF (Sender Policy Framework) and DKIM (DomainKeys Identifyed Mail) records are not properly configured. These settings help to verify that your email really comes from you.
- Use of words that are often in SPAM messages
- Search email filters for words that are often used in SPAM, such as "free," "win," or "click here." Using these words can make your message sign as SPAM.
- Sending too many emails in a short time
- Sending emails to a large number of recipients in a short time may cause suspicious activity. This is often associated with mass mailings or Junk campaigns.
- Recipients mark your email as SPAM
- If recipients have previously flagged your email as SPAM, this may affect the reputation of your email address or domain. Email providers will then treat your messages more often as SPAM.
- Low Mail Engagement
- If your recipients do not open or respond to your emails, this may be a signal to email filters that your messages are unwanted. Email providers include email behavior in their decision to mark email as SPAM.
How can I solve this problem?
Fortunately, there are several ways to make sure your email is not marked as SPAM. Here are some useful tips:
- Check your email settings
- Make sure you SPF, DKIM and DMARC records are set correctly. These settings help to verify that your email actually comes from you and prevent your messages from being marked as SPAM.
- Avoid SPAM-like words
- Do not use words that often appear in SPAM emails, such as "free," "win," "buy now" or "no charge." Be careful how to write your email and make sure the message is clear and relevant.
- Send emails to fewer recipients at once
- Avoid sending emails to thousands of people at once. Send in smaller batches and make sure the email is relevant to the recipients.
- Ask recipients to add you to their safe list
- Ask recipients to add your email address to their address book or list of safe senders. This helps to ensure that your messages are not marked as SPAM.
- Use a SPAM test tool
- Before sending important emails, you can use a SPAM test tool. These tools check your message for SPAM-like features and give advice on how to improve it. For example, mail-tester.com
- Provide relevant and valuable content
- Send emails that contain valuable and relevant information for the recipient. E-mails that are perceived as useful are less quickly marked as SPAM.
Conclusion
It is important to understand why your email can be marked as SPAM and what you can do to prevent this. By setting your email settings properly, choosing the content of your messages carefully and optimizing your shipping behaviour, you can make sure your messages reach the right inbox. Do you need help setting up your email settings? Please feel free to contact us!
SSL · cPanelUsing HTTPS automaticallyHow do I automatically use HTTPS? SSL certificates are not automatically used by default. You need to replace 'http://' in the address bar with 'https://'...Read the manual
Using HTTPS automatically
How do I automatically redirect to HTTPS?
SSL certificates are not automatically used by default. You should then replace 'http://' in the address bar with 'https://'. In this article we explain how to make sure that your website automatically uses 'https://'.
Important
In this article we use a .htaccess file to automatically use HTTPS. If you already have a .htaccess file in your web space, place the content we discuss in this article above all other rules.
Step-by-step guide
Step 1. Log in to cPanel.
Step 2. Under the category 'Files', click 'File Management'.
Step 3. Navigate to the folder of the domain name concerned. Click 'Settings' at the top right and check 'Show hidden files (dotfiles). Click 'Save'.
Step 4. If there is already a .htaccess file, then click on it with the right mouse button and click on 'Edit'. If there is no .htaccess file yet, then click on '+ File' at the top left. Enter as new filename '.htaccess'.
Step 5. Paste the following code into the .htaccess file:
RewriteEngine On
RewriteCond %{HTTPS} off
RewriteRule (.*) https://%{HTTP_HOST}%{REQUEST_URI} [R=301,L]
Step 6. Click on 'Save changes' at the top right. Anyone who is not entering 'https://' will be redirected automatically.
SSL · cPanelHow do I request a Let's Encrypt certificate and enable it for a domain in cPanel?Follow these steps to request and activate a free Let's Encrypt SSL certificate on a domain via cPanel: Step 1: Log in...Read the manual
How do I request a Let's Encrypt certificate and enable it for a domain in cPanel?
Follow these steps to get a free Let's Encrypt SSL Certificate to request and activate on a domain via cPanel:
Step 1: Log in to cPanel
- Open your browser and go to the cPanel login page. This is usually found on
https://jouwdomein.nl/cpanelor via a link from your hosting provider. - Log in with your cPanel username and password.
Step 2: Go to the SSL/TLS section
- Search the cPanel dashboard for the section Security.
- Click "SSL/TLS Status' or "SSL/TLS'.
Step 3: Open the Let's Encrypt SSL Tool
- In some cPanel installations there is a separate section called "Let's Encrypt SSL" or "AutoSSL'Look for this in the cPanel dashboard.
- Click on the right tool to start the process.
Step 4: Select the domain
- A list of your domains will appear. Select the domain (and any subdomains such as
wwwormail) for which you want to set the SSL certificate. - Check if the domain refers correctly to your server. You can test this via a DNS check or by viewing the domain settings in cPanel.
Step 5: Request the certificate
- Click on the button Installing certificate or "Run AutoSSL' (depending on the interface).
- The tool now requests a Let's Encrypt SSL certificate and validates the domain. This process usually takes a few seconds to a few minutes.
Step 6: Confirm the installation
- Once the process is complete, you will receive a notification that the certificate has been successfully installed.
- Check that the certificate is active by going to the part "SSL/TLS Status' go. Here you see a green lock or a notification that the certificate is active.
Step 7: Force HTTPS (optional)
- To ensure that your website is always loaded via a secure connection, you can use a HTTPS Redirect set:
- Go to the .htaccess file from your website via the File Manager in cPanel.
- Add the following lines to your .htaccess file:
- Some cPanel installations have an option to automatically force HTTPS into the "Domain Management"- Section.
Step 8: Check your website
- Visit your website and check that a green lock is visible in the address bar of your browser.
- Use a tool like SSL Labs to test and validate your SSL configuration.
Trouble?
If you have any problems, check:
- Whether your domain is correctly referring to your server (DNS settings).
- Whether there are no old certificates causing conflicts.
- Whether your Let's Encrypt hosting package supports.
With these steps your website is safe and equipped with a free Let's Encrypt SSL certificate! ????
Web hosting · cPanelHow do I log in via FTP with FileZilla?FileZilla is a free program that you use to log on to your hosting account via FTP. This allows you to easily manage all files...Read the manual
How do I log in via FTP with FileZilla?
FileZilla is a free program that you use to log on to your hosting account via FTP. This allows you to easily manage all files within your hosting account.
Important
-
FileZilla has not been developed by us. Therefore, we do not provide any warranty or support for this program. If you have any questions, go to the FileZilla website.
-
In the roadmap we use FileZilla for Mac, but FileZilla for Windows works exactly the same. So you can just follow this step-by-step plan if you have Windows.
Step-by-step guide
Step 1. Download FileZilla
-
Go to the FileZilla website.
-
Click on Download FileZilla Client
-
Install FIleZilla.
Step 2. Connect via FileZilla
To connect to FIleZilla you can use two ways:
-
Quick Connect
-
Via Site Management
Both methods are dealt with below:
Quick Connect:
-
Start FileZilla
-
Fill in the following information at the top:
-
Host: Enter your domain name if your domain name is already active, or enter the server address. The server address for normal hosting packages is 'wwwXX.drechthosting.nl' and for premium hosting packages 'premiumXX.drechthosting.nl.nl'. You replace 'XX' with the number of the server that contains your hosting package.
-
Username: Fill your cpanel username or username of your created FTP account
-
Password: Fill in your cpanel password or password from your created FTP account
-
Port: 21
-
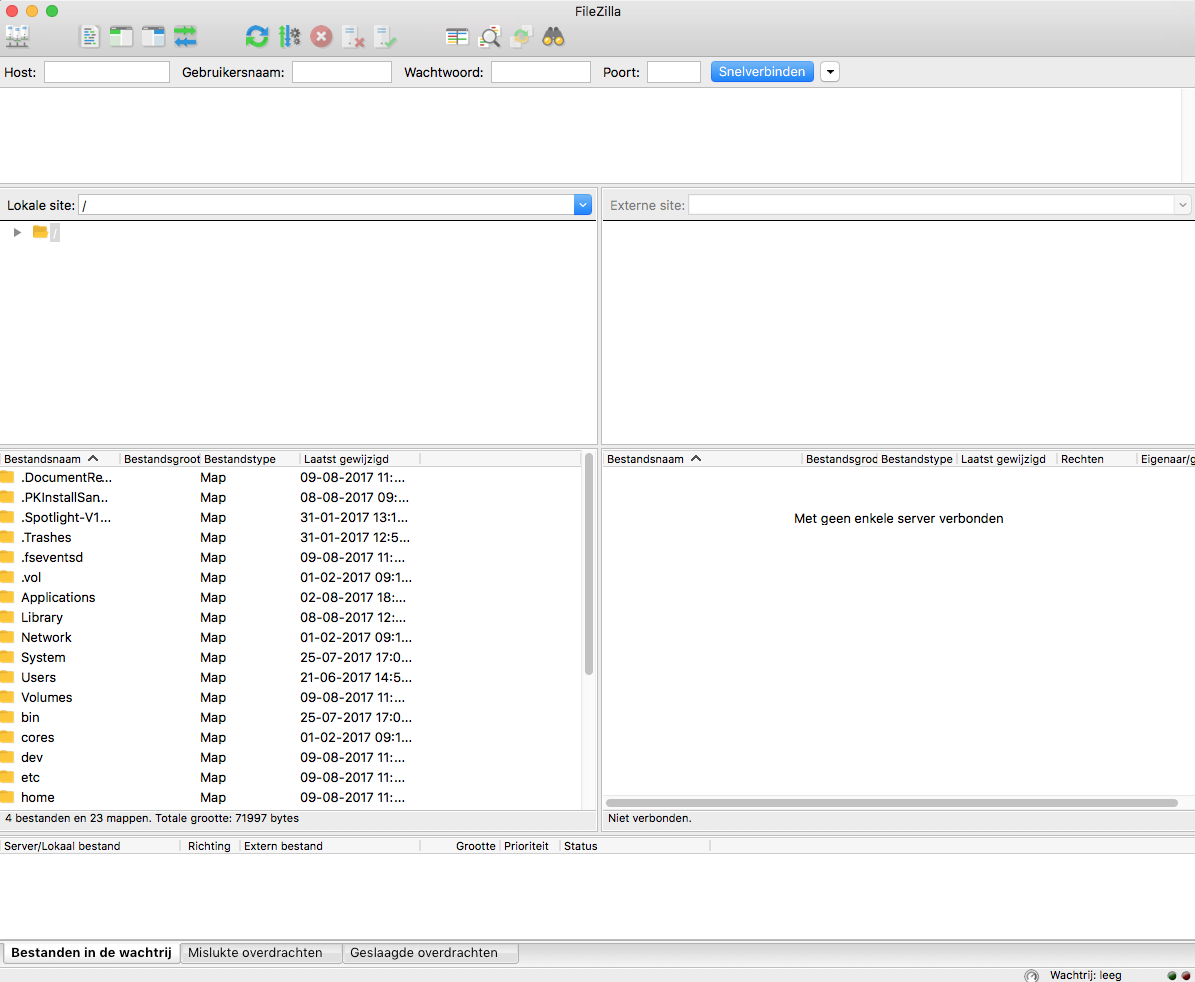
-
Click Quick Connect.
-
You have now successfully connected to your hosting account. You can now manage all files.
Via Site Management
-
Start FileZilla
-
Click File menu item.
-
Click Site Manager.
-
Click New site.
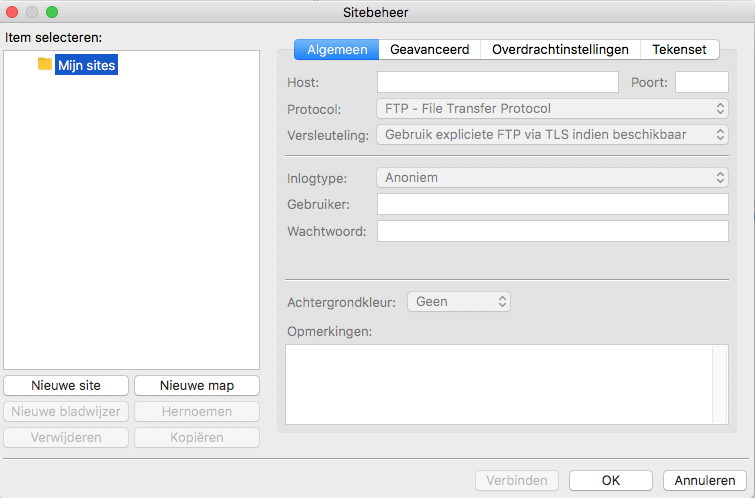
-
Enter a name so you can use this connection more often
-
Then fill in the following details:
-
Host: The server you want to connect to. Enter your domain name if your domain name is already active, or enter the server address. The server address for normal hosting packages is 'wwwXX.drechthosting.nl' and for premium hosting packages 'premiumXX.drechthosting.nl'. You replace 'XX' with the number of the server that contains your hosting package.
-
Port: 21
-
Protocol: FTP - FILe Transfer Protocol
-
Encryption: Use explicit FTP via TLS available
-
Login Type: Normal
-
User: Fill in your cpanel username or username of your created FTP account
-
Password: Fill in your cpanel password or password from your created FTP account
-
-
Click Connect to connect.
-
You have now successfully connected to your hosting account. You can now manage all files.
Web hostingHow do I edit the hosts file, and why would I do this?The host file is a system file that controls the translation of domain names to IP addresses. It can be customized locally on your computer to create specific domains...Read the manual
How do I edit the hosts file, and why would I do this?
The hostfile is a system file that controls the translation of domain names to IP addresses. It can be customized locally on your computer to point specific domains to certain IP addresses, which is useful for for example blocking websites, testing a new website or redirecting traffic. Editing the host file can be useful for developers, network administrators or for solving problems with website access.
Pay attention: Editing the host file must be done carefully, as an error may affect the operation of your network or internet connection.
Why are you adjusting the hostfile?
There are several reasons why you would like to customize the host file:
- Test website: You can temporarily redirect a domain to another IP address, for example to test a website on a local server before it goes live.
- Blocking websites: You can block access to certain websites by pointing the IP address to an unreachable location (such as 127.0.0.1).
- Traffic diversion: It can be used to redirect traffic to another server for load balancing or other network settings.
- Detaching DNS problems: Sometimes the host file can help to bypass DNS problems by correctly setting the domain names.
How to edit the host file?
Windows
Step 1: Open Block as Administrator
- Click on Start-button, type Notebook in the search field, right-click on Block and choose Run as administratorThis is necessary to access the host file.
Step 2: Open the host file
- Click in Notebook on Stock > Open.
- Navigate to next location:
C:\Windows\System32\drivers\etc\hosts - Make sure to set the file type option to All Files to make the file visible.
Step 3: Edit the file
- You can now add or edit lines. Each line has the format:
IP address domain name
For example, to redirect a website to your local machine:127.0.0.1 www.example.com
Step 4: Save the file
- After making the desired changes, save the file by Stock > Save to be chosen.
Step 5: Flush DNS cache (optional)
- To make sure the changes have a direct effect, you can delete the DNS cache. Open the command prompt as administrator and enter the following command:BashCode copy
ipconfig /flushdns
macOS
Step 1: Open the Terminal
- Go to Programmes > Tools > Terminal.
Step 2: Open the host file
- Enter the following command to open the host file with a text editor (e.g. nano):
sudo nano /etc/hosts - Enter your administrator password when requested.
Step 3: Edit the file
- Add the desired lines, such as:Copy Code
127.0.0.1 www.example.com
Step 4: Save the file
- Press Ctrl + O to save the file and Ctrl + X to leave nano.
Step 5: Flush the DNS cache
- To apply the changes, enter the following command:Copy Code
sudo killall -HUP mDNSR Sponder
Linux
Step 1: Open the Terminal
- Open the Terminal on your Linux system.
Step 2: Open the host file
- Use a text editor like nano to edit the host file:
sudo nano /etc/hosts
Step 3: Edit the file
- Add the lines you want to change: Copy Code
127.0.0.1 www.example.com
Step 4: Save the file
- Press Ctrl + O to save the file and Ctrl + X to leave the editor.
Step 5: Flush the DNS cache
- To apply the changes, enter the following command:Copy Code
sudo systemctl restart network manager
Important tips:
- Back up: It is always good to back up your host file before making changes so that you can fix it if something goes wrong.
- Note the syntax: Make sure to use the correct syntax when adding IP addresses and domain names to avoid errors.
- Test after adjustment: After adjusting the host file, check whether the desired changes are working correctly, for example by opening a website in your browser or using
pingtesting the domain.
By adjusting the host file, you can control how certain domains are handled on your computer. It is a powerful tool, but it should be used with caution to avoid accidental disruption of network settings.
Do you need help adjusting your host file or do you have other questions? Please feel free to contact us!
SPAMHow do I stop spam via Spam Filters?In cPanel we have an option called Spam Filters that is powered by Apache SpamAssassin, so you are sure you will have much less...Read the manual
How do I stop spam via Spam Filters?
In cPanel we have an option called Spam Filters that is powered by Apache SpamAssassin, so that you are sure to receive much less spam. This is completely free and this article explains how to set it.
Configuring the spam filter
Step 1. Log on to your cPanel.
Step 2. Click Spam Filters in the Email category.
Step 3. Click Process New Emails and Mark them as Spam (if it is disabled).

Step 4. Go to Spam Threshold Score and put it on Default (5) or Recommended for well tested servers (4) and click on Update Scoring Options.
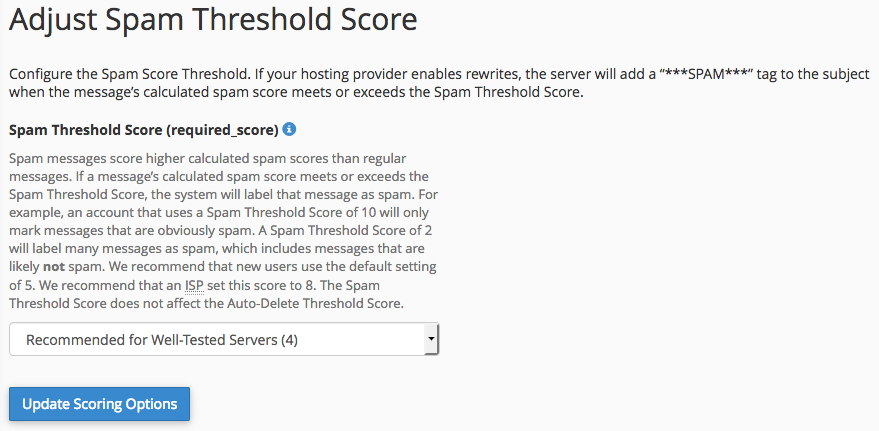
Deleting existing spam messages
Step 1. Log on to your cPanel.
Step 2. Click Spam Filters in the Email category.
Step 3. Click Automatically Delete New Spam (AutoDelete) navigate to Configure Auto-Delete Settings.

Step 4. Make sure that the required_score on 5 or 4 is and click on Update Auto Delete Score.
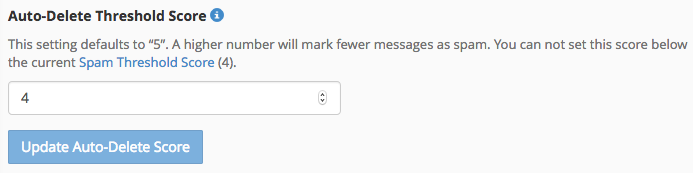
Step 5. All messages with that specific spam score will then be deleted.
Pay attention: If you still receive a lot of spam you can reduce the required_score to an adjusted number of 3.
SPAMHow do I set up DMARC?DMARC is an abbreviation for Domain-based Message Authentication, Reporting and Conformance. It is designed to detect and prevent spoofing of email. DMARC usage...Read the manual
How do I set up DMARC?
DMARC is an abbreviation for Domain-based Message Authentication, Reporting and ConformityIt is designed to detect and counter spoofing of email. DMARC is always used in combination with existing SPF and DKIM records.
You can join us. 2 Ways using a DMARC record. You can choose to create a DMARC record yourself via a generator or to indicate in your DMARC that you are not using DMARC, cPanel does not have any support for this. The reason for this is that DMARC is not used very much, not having a DMARC record is not a problem either.
In this article do discuss both methods. We recommend that you DMARC set also SPF and DKIM set if these are not yet active.
Also read: SPF records - What is it and how do I set them?, How do I set up DKIM? and Why are my e-mails considered spam?
Generate DMARC record
Since cPanel itself does not have support for the generation of a DMARC record you will not find it under the verification setting. However, you can set the DMARC record manually in the DNS, for this you can use this DMARC Generator use:
https://elasticemail.com/dmarc/
The generator goes through a number of customizable steps with you to create your DMARC record. This allows you to indicate whether you just want to monitor, move or refuse mails that have been spoofed to the spam. You can also set whether you want to receive reports and how strict the DMARC should be.
The record you generate is placed in the DNS of your domain.
Also read: How do I manage my DNS records?
Use DMARC to indicate that there is no DMARC
Another option is to explicitly state that your domain does not use DMARC via the record below, you just need to yourdomainnamehere.tld change to your domain name. This will not affect the delivery of the email.
_dmarc.jedomainnamehere.tld TXT v=DMARC1; p=none;
SPAMWhy are my emails marked as spam?Do you encounter problems with emails that you send to your contacts because they arrive in the spam folder or are refused because of spam?Read the manual
Why are my emails marked as spam?
Do you encounter problems with e-mails that you send to your contacts because they arrive in the spam folder or are refused because of spam? Unfortunately, the solution to this is not so simple because we use mail traffic very differently today than it was originally developed for. There may be several reasons why a recipient receives your e-mails as spam or even refuses because of spam. In this article we discuss the most common forms and what you can do to reduce the chances that this occurs.
Most common causes
Word usage
If your mails are refused based on the content, you will get a message about it in most cases, but this doesn't always have to be the case. If you get a response from the receiving server, it will be something like "550 the content of this message looked like spam"This means that the content of your mail contains words or texts that are very similar to spam, the spam filter of the receiving party will then refuse your mail purely based on the content.
Below are some examples of words / topics that may be a reason for spam filters to see your mail as spam. Obviously, the context and amount of the use of the word / subject is partly decisive in this. You can find various websites online that use more extensive lists. Essentially, you have to pay attention to which words and topics you use in your mails and to which you put the emphasis.
- Free
- Discount
- Benefits
- Special offer
- Viagra
- Sexually motivated cases
- Drugs
- Medical treatment
- Order today
- This isn't a spam.
- Sign Up
- Save
Wrong set DNS
It is possible that the receiving party does checks by means of SPF and DKIM, these are DNS records you can manage yourself for your domain. With a shared hosting package and a domain that runs through us, this will automatically be set for you, any changes you need to maintain yourself. Cloud users should carry out the configuration for DKIM themselves, also SPF is under their own management.
To check which points in your mail traffic are worth improving you can send a test email to a test address at mail-tester.com. The result of this indicates which points can be improved, with a simple test email you may get down points because the text is known or such, you can of course ignore that.
The most common points that can easily be solved are those SPF and DKIM records. If, for example, you use your own mail server instead of those of Neostrada, we recommend that you add it to your existing SPF record by adding it to your existing SPF record. This lets your recipient who checks it know that the mail server is recognized to email through your domain. DKIM can also help as an additional means of verification for recipients.
In some recipients, a DMARC Even though this is easy to set it is not bad if it is missing, mail-tester also does not give you a discount. Reason for this is because DMARC is not used very much.
With the combination mentioned above, you can go through the mail tester successfully in most cases. In some cases, there are also points that are about content or formatting. It is advisable to follow those advices even if they do not deduct many points. In a high mail tester score, the probability that mails are seen as spam for technical and substantive reasons is low in theory.
The receiving party blocks your domain
It is possible that the receiving lot one blacklist uses domains that they do not trust. To know whether this is the case, it is best to contact your recipient first or not accidentally put your domain in the spam filter (if he/she has that option), otherwise the host or the email manager may be able to tell you more about it.
In some cases the receiving server also responds to this via the mail delivery system. This may look like "550 Email blocked by..." or "550-Message refused by spam filter".
IP reputation
If you are with us a Cloud / VPS It is possible that the IP Address of your server a certain reputation has been built by receiving parties that works to the disadvantage (or advantage) of receiving emails from your server.
The ip reputation is determined by several factors, such as the content of the average messages, messages that often get into the spam, the total amount of emails sent, messages that are sent to non-existent emailboxes (this is typical behavior of spammers), all of which is used to determine the reputation of your ip address. If a receiving server looks at this reputation, it can determine whether or not to send the mail to the recipient.
cPanelManage files in cPanelWith Drechthosting, you get access to a powerful cPanel dashboard that allows you to easily manage your website's files. Whether you have new files...Read the manual
Manage files in cPanel
With Drechthosting You get access to a powerful cPanel dashboard that allows you to easily manage your website's files. Whether you want to upload new files, edit existing files or organize folders, cPanel's File Manager is your ideal tool. In this guide we explain step by step how to manage files at Drechthosting.
What is cPanel and how to use it at Drechthosting?
cPanel is a user-friendly control panel that gives you easy access to your hosting environment. At Drechthosting cPanel offers an intuitive File Manager, with which you can manage your website files without technical knowledge.
Why manage files via Drechthosting's cPanel?
- No additional software is required, such as an FTP client.
- Direct access to your website files.
- Quickly upload, download and edit files.
- Fully integrated in your hosting package at Drechthosting.
How do I use the File Manager in cPanel at Drechthosting?
1. Login to cPanel
- Go to Drechthosting's cPanel dashboard. You do this by browsing to
yourdomain.nl/cpanelor via the link in your Drechthosting account. - Fill in your login details, which you received from Drechthosting when purchasing your hosting package.
2. Open File Manager
- Search the cPanel dashboard for File Manager (File Manager).
- Click on it to access all the files and folders of your website.
3. Navigate in File Manager
The File Manager shows an overview of your files and folders:
- /public_html/: The root directory that contains your website files.
- Use the navigation bar or double-click on folders to open it.
4. Upload Files
- Navigate to the desired folder (usually /public_html/).
- Click Upload in the menu bar.
- Select the files on your computer and wait until the upload process is complete.
5. Edit Files
- Right-click on a file and choose Edit (Edit).
- Use cPanel's built-in text editor to make changes.
- Click Save to make your changes.
6. Download Files
- Select the file you want to download.
- Click Download in the menu bar.
7. Manage files and folders
- Create a new folder: Click on Add Folder (New Folder) and name the folder.
- Delete Files: Select a file and click Delete (Delete).
- Move or Copy: Use the options Move (Move) or Copy (Copy).
Useful tips for Drechthosting users
- Backup: Make regular backup of your files via the backup feature in cPanel.
- Customize Rights: Check the file permissions (644 for files, 755 for folders) if you have problems with access.
- Use compression: Pick up multiple files in a zip file for easier management.
Common problems and solutions at Drechthosting
- Cannot upload files: Check the maximum upload limit or contact the support of Drechthosting.
- File manager not working: Try another browser or empty your cache. In case of permanent problems you can always consult the helpdesk of Drechthosting.
- No access to cPanel: Check if you are using the right login data or request new data from Drechthosting.
Conclusion
With the File Manager in cPanel at Drechthosting you can easily manage your website files. From uploading and editing to making backups: everything is accessible via a clear interface. Do you still have any questions? Contact Drechthosting's excellent customer service and get immediate help with all your hosting questions!
With Drechthosting, you can make managing via cPanel simple and efficient.
cPanelHow do I use the LiteSpeed Cache plugin with cPanel?What is LiteSpeed Cache Plugin? LiteSpeed Cache (LSCache) is a powerful caching solution that accelerates your website by temporarily uploading page...Read the manual
How do I use the LiteSpeed Cache plugin with cPanel?
What is LiteSpeed Cache Plugin?
LiteSpeed Cache (LSCache) is a powerful caching solution that speeds up your website by temporarily storing pages and dynamic content and serving faster. It works with the LiteSpeed Web Server and offers better performance than traditional caching methods.
How do I activate LiteSpeed Cache in cPanel?
-
Login to your cPanel account.
-
Search for LiteSpeed Web Cache Manager in the search bar.
-
Open the tool and click "Enable Cache" for your domain.
-
Check that the cache works correctly by visiting your website and comparing the loading time.
How can I configure LiteSpeed Cache?
-
For WordPress: Install the LiteSpeed Cache Plugin in WordPress and adjust the settings via the dashboard.
-
For other CMSs: Check that your platform is compatible and configure the cache settings via the LiteSpeed Web Cache Manager in cPanel.
How can I empty the cache?
-
Go to LiteSpeed Web Cache Manager in cPanel.
-
Click "Flush All" to empty the cache.
-
You can also empty the cache via your CMS (e.g. in WordPress via the LiteSpeed Cache Plugin).
Can I exclude certain pages from caching?
Yes, you can exclude specific URLs or pages by modifying the .htaccess configuration or using the settings in the WordPress LiteSpeed Cache Plugin.
How do I check if LiteSpeed Cache is active?
-
Use a browser inspection tool and check the HTTP headers. You might have something like
X-LiteSpeed-Cache: hitsee if the cache is active. -
You can also test with a speed test such as GTmetrix or PageSpeed Insights to see if your site loads faster.
What should I do if my website doesn't work properly with LiteSpeed Cache?
-
Try emptying the cache and see if the problem is solved.
-
Check if certain plugins or scripts conflict with LiteSpeed Cache.
-
Turn caching off temporarily and test your website.
-
Adjust the cache settings, for example by changing object or database cache.
How much faster will my website get with LiteSpeed Cache?
The exact speed gain depends on several factors, but you usually see 30-70% shorter loading times compared to no caching.
Is LiteSpeed Cache free?
Yes, LiteSpeed Cache is available for free to LiteSpeed Web Server users, but some advanced features require a Enterprise license.
How do I disable LiteSpeed Cache?
-
Go to LiteSpeed Web Cache Manager in cPanel.
-
Click "Disable Cache" for your domain.
-
In WordPress you can deactivate or remove the LiteSpeed Cache Plugin.
cPanelHow do I view Imunify security in cPanel?Imunify is a powerful security tool that protects your website against malware, hackers and other online threats. Via cPanel you can easily access the security status of...Read the manual
How do I view Imunify security in cPanel?
Imunify is a powerful security tool that protects your website from malware, hackers and other online threats. CPanel allows you to easily control and manage the security status of your website. In this article we explain step by step how to view Imunify's security via cPanel.
Step 1: Log in to cPanel
- Open your browser and go to the cPanel login page. This is usually found on
https://jouwdomein.nl/cpanelor via a link from your hosting provider. - Log in with your username and password.
Step 2: Open ImunifyAV or Imunify360
- Search the cPanel dashboard for the section Security.
- Click ImunifyAV or Imunify360, depending on what your hosting provider offers.
Step 3: View detected threats
When you open Imunify, you will immediately receive an overview of the security status of your website. Here you see:
- Number of scanned files: Total number of files checked by Imunify.
- Malware Detections: A list of any malicious files detected.
- Actions: Possibilities to quarantine, restore or delete suspicious files.
Viewing quarantined files
- Click on the tab Quarantine to see a list of files quarantined by Imunify.
- Check each file and decide whether you want to recover it or delete it permanently.
Step 4: Check firewall logs
Imunify contains an advanced firewall that stops real-time attacks. You can view the logs to see which attacks are blocked:
- Go to the tab Firewall.
- See an overview of blocked IP addresses and the type of attack detected.
- If necessary, add IP addresses to the whitelist or blacklist.
Step 5: Manage automatic scans
Imunify automatically performs scans to protect your website. You can customize these settings:
- Go to the tab Settings or Scan Scheme.
- Adjust how often scans should be performed.
- Make sure that automatic updates are enabled for optimal security.
Step 6: Check reputation management
Imunify checks that your website is blacklisted with search engines or security services. To check this:
- Click on the tab Reputation management.
- View the status and receive notifications if action is required.
Conclusion
With Imunify via cPanel, you have the tools to keep your website safe. By checking security status regularly and taking action on detected threats, you can have peace of mind about protecting your website.
If you need help using Imunify, please contact our support department!
cPanelHow do I change my admin password with Softaculous?For every software package you install via Softaculous, you can also change the password of your admin account. If you don't have the password...Read the manual
How do I change my admin password with Softaculous?
For every software package you install via Softaculous, you can also change the password of your admin account. If you don't know the password, you can always change it.
In this article we explain how to change the admin password via Softaculous.
Step-by-step guide
Step 1. Log in to cPanel.
Step 2. Click under the category Software on Softaculous Apps Installer.
Step 3. Softaculous is now opening. Click at the top Installations.
Step 4. Click on the Edit icon.

Step 5. Fill Under Admin Account your username with Admin username (Otherwise Softaculous doesn't know which username you want to change the password with).
Step 6.. Enter a new password Admin Password.
Step 7. Click Change installation givens.
Step 8. Hooray! You now see a screen that the change has been done. You will also receive an email from Softaculous that a change has taken place.
cPanelHow do I set up cron jobs?When you have a website/webshop, there is sometimes a series of tasks that you perform to keep the website up to date or with which you...Read the manual
How do I set up cron jobs?
Sometimes when you have a website/webshop there is a set of tasks that you perform to keep the website up to date or with which you perform certain actions. You can run these tasks manually, but it is easier to have them performed automatically for you. Cronjobs are useful for this; these are periodic tasks that are performed by the server.
In this article we explain how to set it up via cpanel and via SSH.
How is a cron job structured?
A cronjob always consists of two parts:
-
A Time Marker
-
The task
Look for an example below:
12 6 ** * php /home/domain1q/public_html/cron.php
We will explain how to read it using the above cronjob
Time indication
For the time indication you can use the following table
|
m |
minutes (0-59) |
|
h |
hours (0-23) |
|
Stupid |
day of the month (1 -31) |
|
mon |
month of year (1-12) |
|
dow |
day of the week (mon,tue,wed,thu,fri,sat,sun) |
So if we look at the example again, we can read it as follows:
m = 12
h = 6
dom = *
mon*
dow = *
This means that every day, in a week, of every month, the cronjob will be called at 06:12.
Specify task
The task part also consists of two parts:
-
used program
-
location of file you want to run
In the example you see that we use PHP as a program and that we use it to run the file cron.php in the location /home/domain1q/public_html/. In short, every day, in a week, of each month, at 06:12 the program PHP is used to execute the file cron.php from the location /home/domain1q/public_html .
Note! To use only php in your cronjob it is important to put the following part at the top of your cronjob:
PATH=/usr/local/bin/:/usr/bin:/bin
Your cronjob will then be as follows:
PATH=/usr/local/bin/:/usr/bin:/bin
12 6 ** * php /home/domain1q/public_html/cron.php
If you don't then php doesn't work and you have to use one of the following options:
- /usr/local/bin/php (then you use the default PHP version of your server)
- /opt/cpanel/ea-php70/root/usr/bin/php (If you want to use PHP 7)
- /opt/cpanel/ea-php56/root/usr/bin/php (If you want to use PHP 5.6)
Additional Options
However, there are some additional parts that you can add to your cronjob which perform different actions. Below we deal with some common additional options:
E-mail output from the cronjob
You can send the output of a cronjob to an email address. To do this, use the following section MAILTO= [email protected]. If you apply this to the cronjob from the example, it will be as follows:
MAILTO= something
12 6 ** * php /home/domain1q/public_html/cron.php
Write output from cronjob to /dev/null
If you do not want to receive any output from the cronjob (possible errors and/or message that it has been executed), add the following section to your cronjob: >> /dev/null 2>> >1
When you apply this to the cronjob from the example, it becomes as follows:
12 6 * * php /home/domain1q/public_html/cron.php >> /dev/null 2>&&1
How do I set up a cron job?
There are two ways to do that with us:
-
Via cPanel
-
Via SSH
Both ways are discussed below
Configure Cronjob via cPanel
In cPanel you can configure cronjobs using the option Cron tasks under the category Advanced

You will then see the following page:
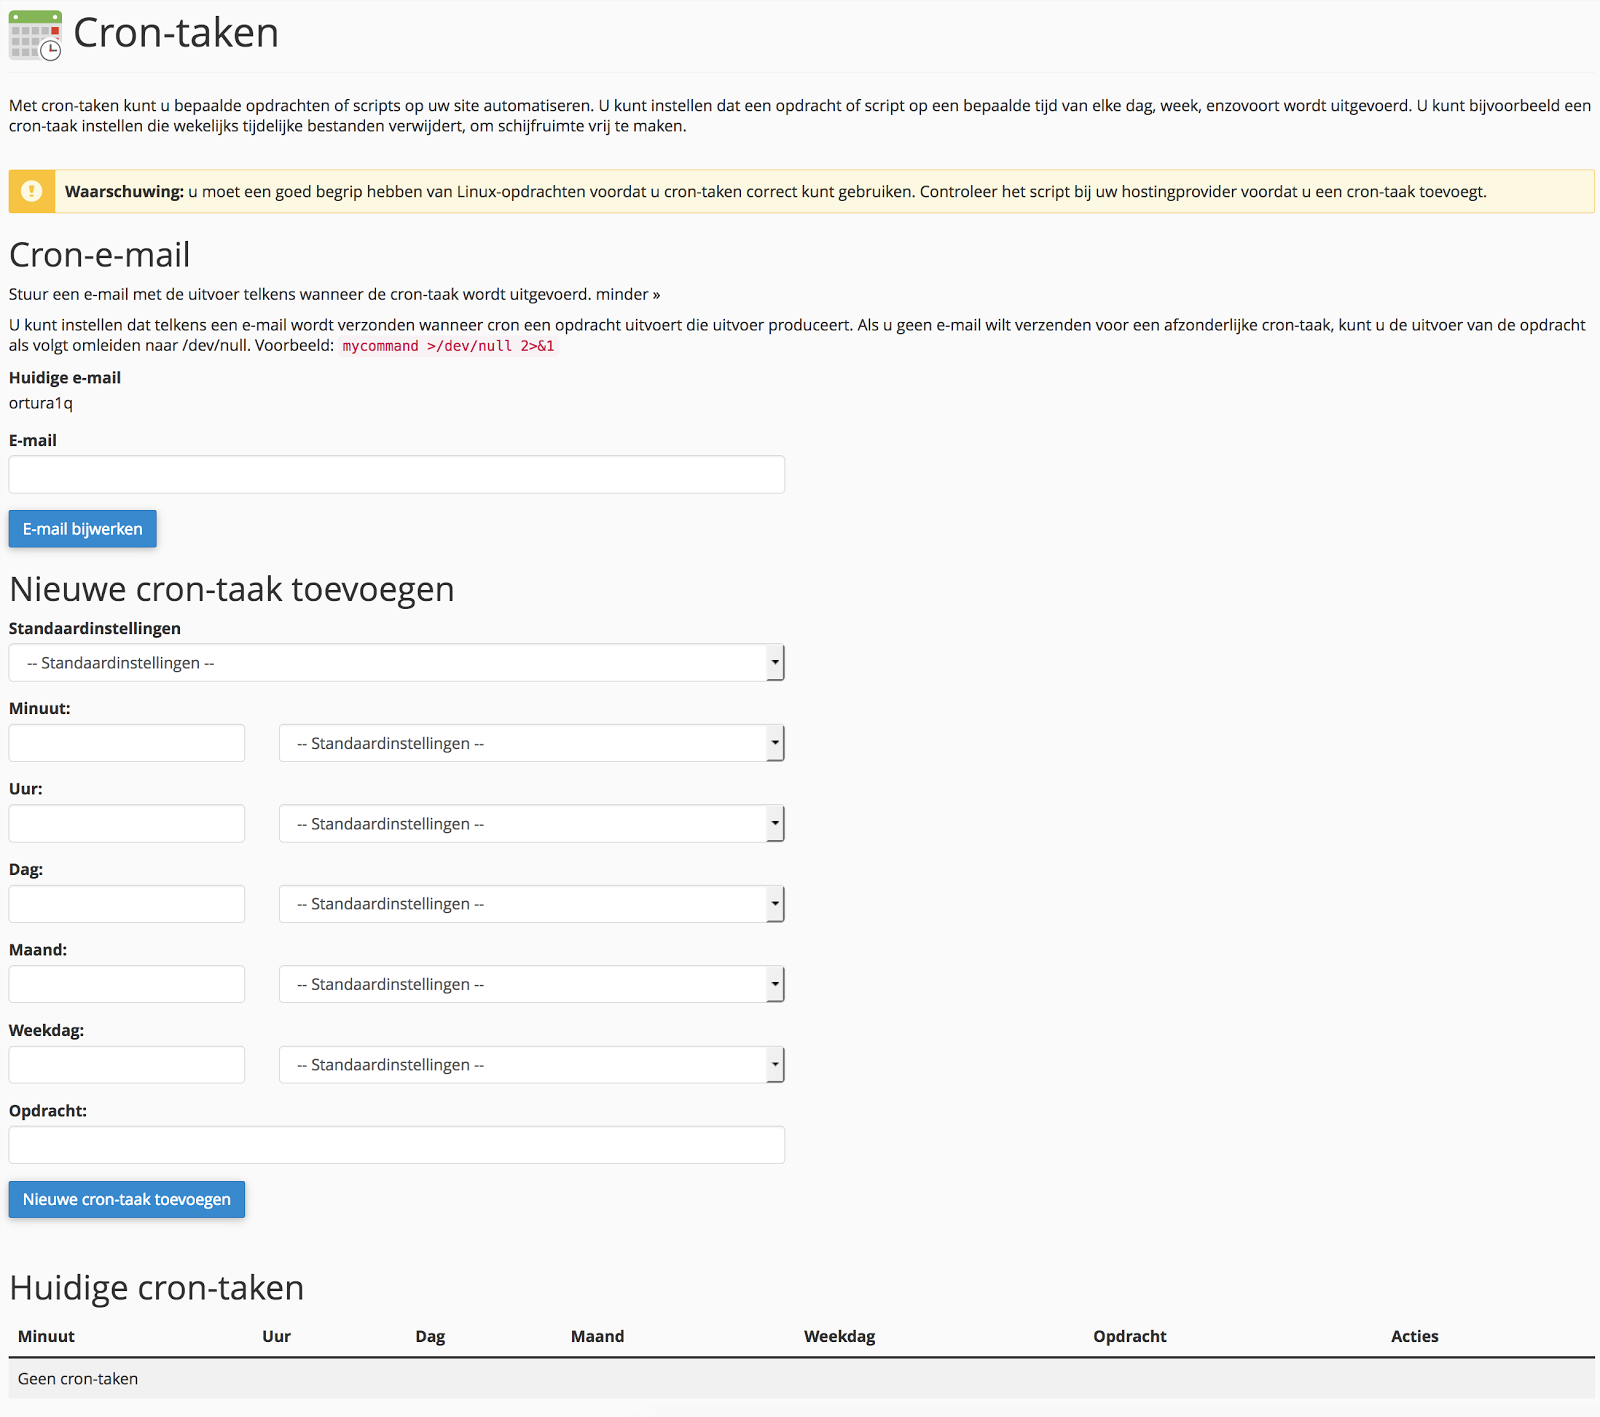
You can do the following things on this page
Email: Here you enter an e-mail address to which you want to send the output of your cronjob.
Add new cron task: Here you can specifically set the time tag yourself or choose a number of pre-programmed settings from Default settings. Under Command, specify the program and location of the file you want to run.
Current cron tasks: Here you can edit already set cronjobs with edit or delete with removal.
Configure Cronjob via SSH
If you are logged in to SSH, use the crontab -e command to set up your crontab.
Frequently asked questions
Can I use Wget or PHP better for my cronjob?
Both programs can be used with us for your cronjob. We recommend you to use the program, which advises the instance of your cronjob.
Why isn't my cronjob working?
Often this has to do with a part of your task not right. Please contact support and we will look with you.
Why are the tasks not carried out in my CRON?
Unfortunately, we can only see if the cronjob you have set is being called. We cannot see whether the tasks you have indicated in your CMS are being performed. You will then have to see what is going on in your CMS yourself.
No manual found. Try another keyword or choose another topic.